

I'm joining Deck The Halls over at Between Naps On The Porch
Frugal Friday over at The Shabby Nest
My post this week is done in two parts so be sure to check out
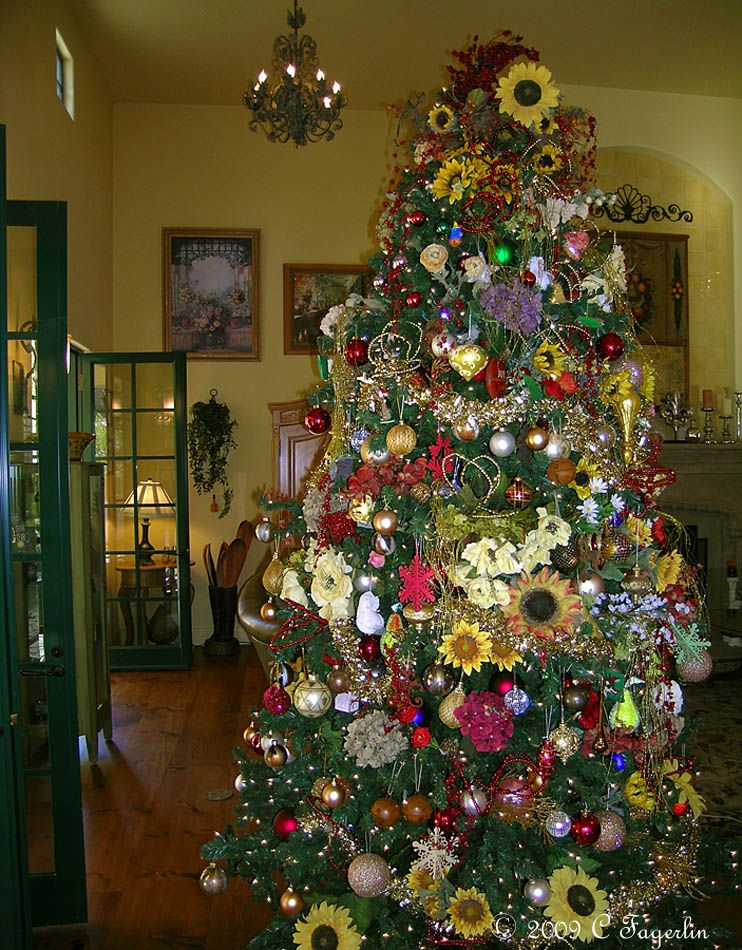
Over the 47 years that I've been decorating Christmas trees for my family
I've had a variety of themes from all the mixed primary colors when the
kids were small to themed trees, but for the last 10 years are so I've done
a mixture of traditional ornaments with a flowery slant.
This was our 2009 tree posted for Met Monday 11/29/09 The lower branches look a little bare because Homer The Cat takes the ornaments off and then hides them all over the house.
Time for a new look! Something lighter, brighter and glittery!
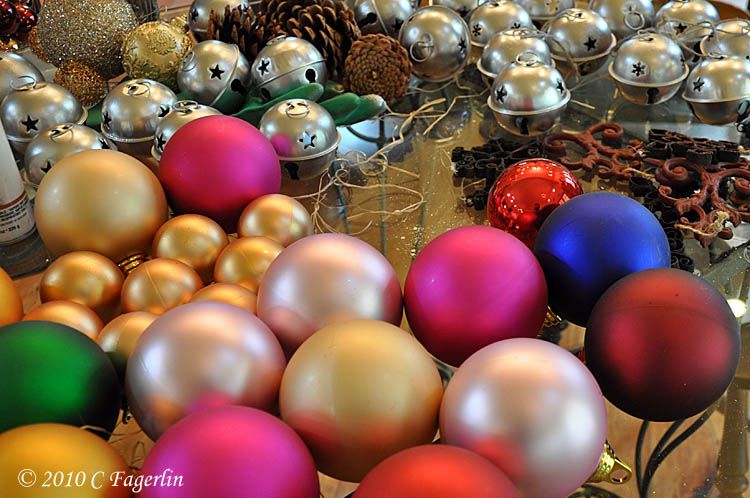
This is our 10' artificial pre-lit tree getting ready for its makeover. It takes a lot of ornaments to fill up this big boy and I didn't want to buy all new ornaments, so I decided to refurbish a lot of the ornaments already in the Christmas stash. I ended up spending a little under $100 for spray paint, spray adhesive, floral picks, craft ornaments, German glass glitter, and silk fans to get a completely new look for this year's tree. The rest of the items I already had from last year's sales and prior projects.

I'll tell you about the ornament makeovers and then post the
finished tree on Christmas Tree 2010 Part 2 - The Decorated Tree
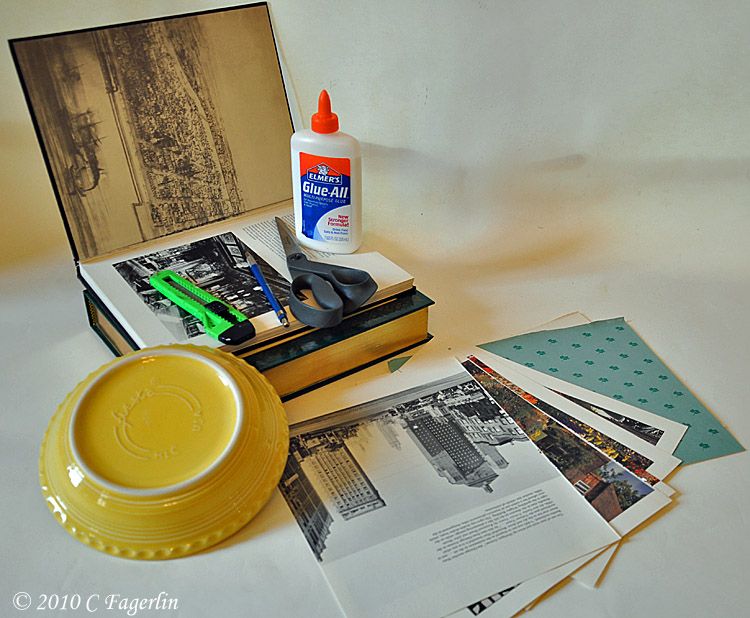
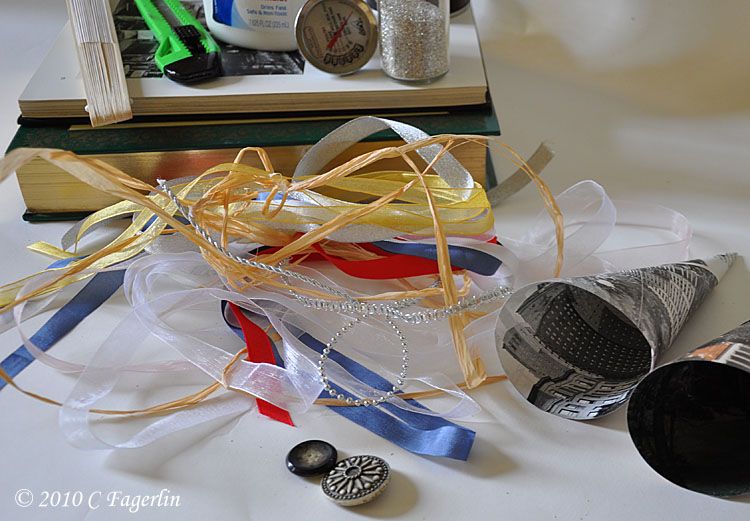
Christmas Cones
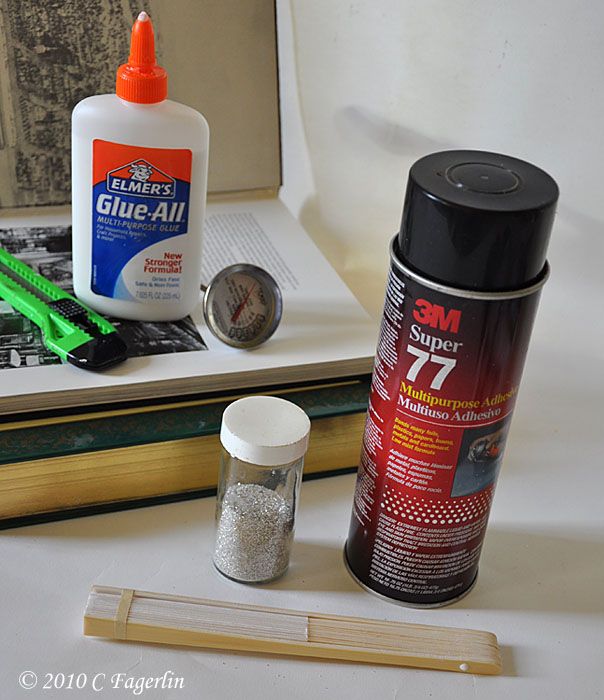
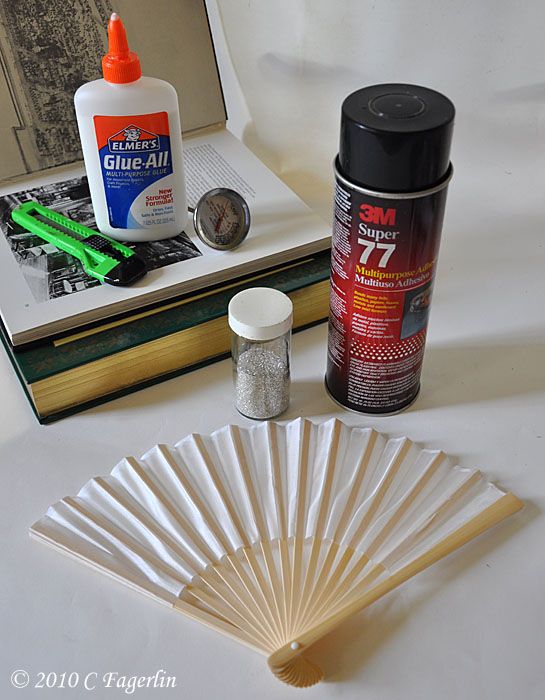
You will need the following supplies:
An old book, the larger the format the better. Box cutter or X-Acto knife, pencil, scissors, glue, circular pattern (like a plate or bowl), hanging cord or ribbon.
Optional: embellishments like beads, buttons, glitter, etc.
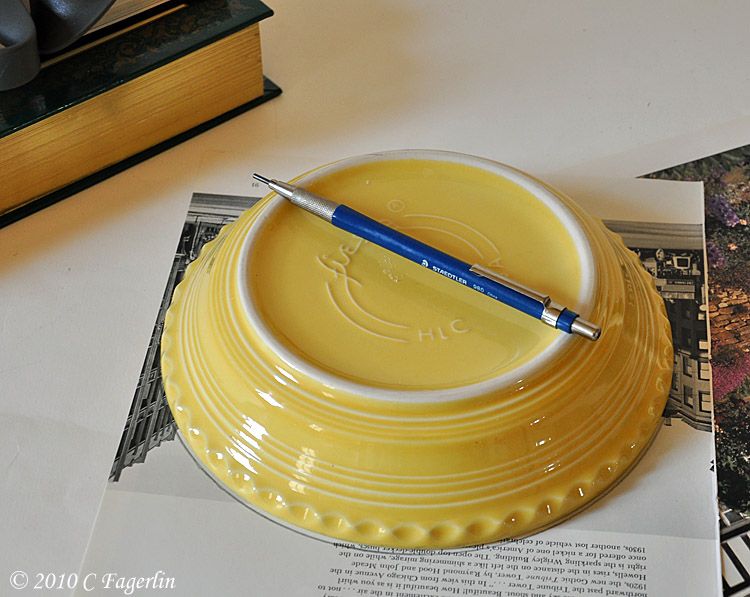
Use your knife to remove pages from the book.
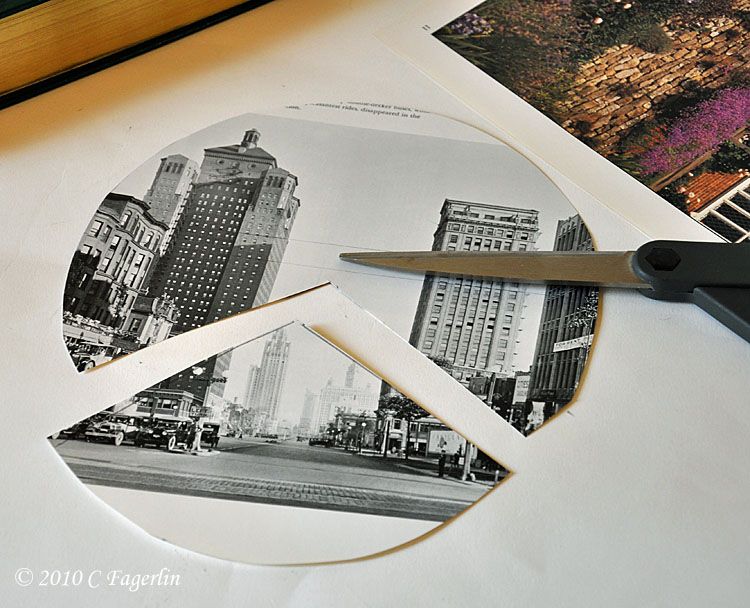
Mark around your circular pattern.
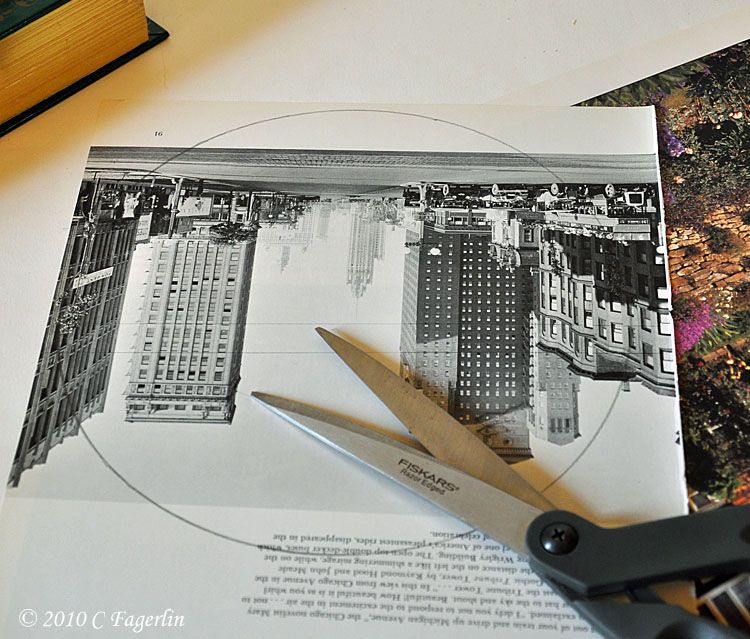
Cut out the circle shape, then remove a pie
shaped portion of the circle that is approximately 1/3 of the circle
and set it aside. (You can embellish your cones with cutouts from
these pie shaped pieces later on.)
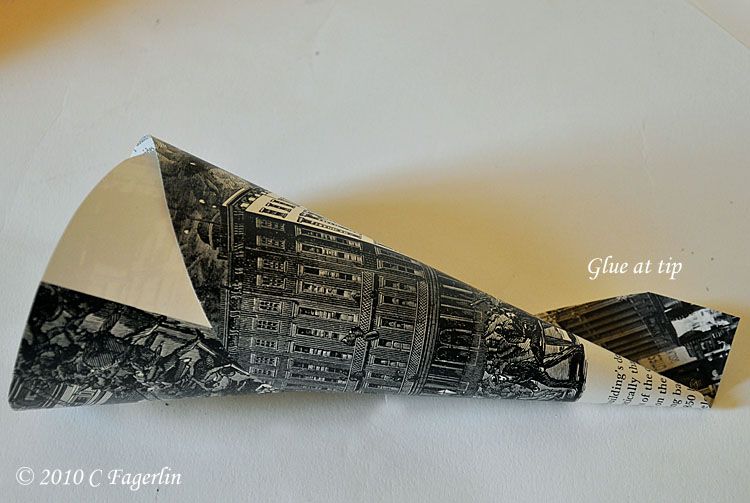
Hold the paper pie in both hands and gently roll it into a cone shape,
rolled loosely or tighter for a smaller/taller cone. While still holding
the rolled cone, put a little glue on the inside fold of the pointed tip of the cone.
Roll your fingers around the tip and hold for a few seconds until glue sets.
Where the edges touch at the top rim, again add a bit of glue to secure the rim.
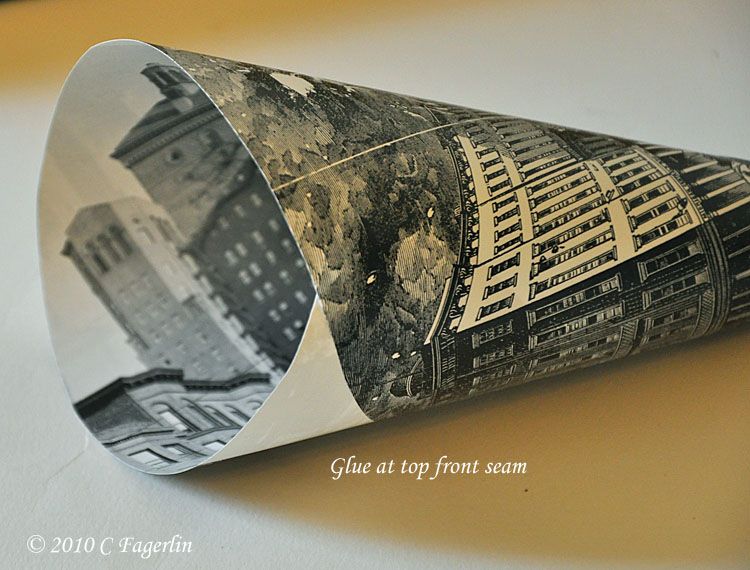
That's all there is to it! So easy and instant gratification.
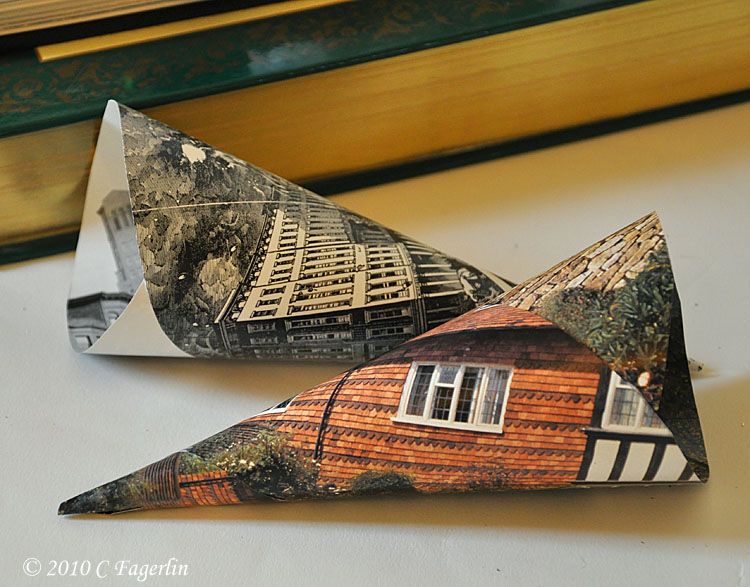
I love the way these black and white images turned out and the surprise
is that the inside of the cone also has something of interest to see.
Any book will work, the lower cone below was a page from a gardening book.
Now all that's left to do is embellish or not, add a hanging cord or ribbon and onto the tree it goes.
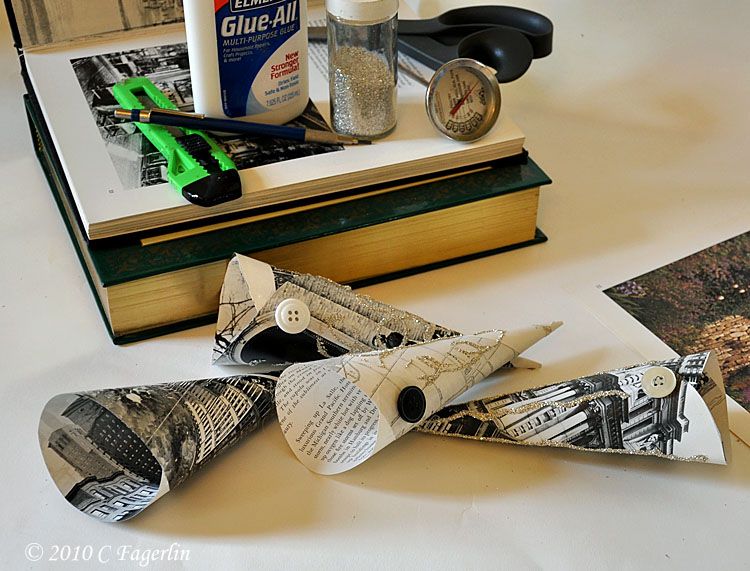
You might have noticed the meat thermometer above ???
I used it to poke a hole on either side below the top rim to string the cord through. :-) You can also add "tails" hanging from the tip of the cone by gluing them inside the tip prior to rolling the cone.

Here's an example of the finished product, see the full effect on

Cones alone would not makeover this big tree, so I went to work with some spray paint, spray adhesive and glitter to spruce up a bunch of old ornaments and some craft ornaments to give them a fresh new look.
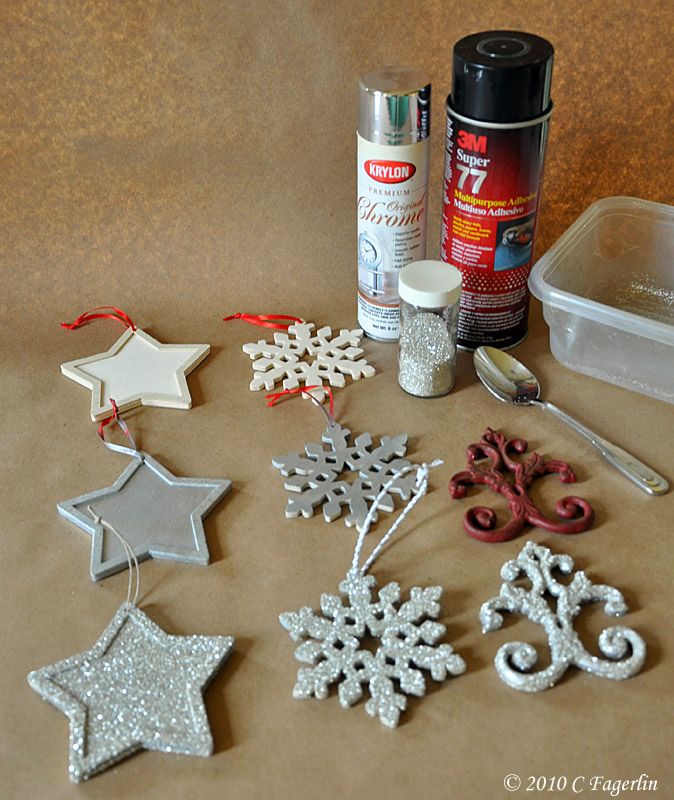
Paint it, spray with adhesive, add glitter!
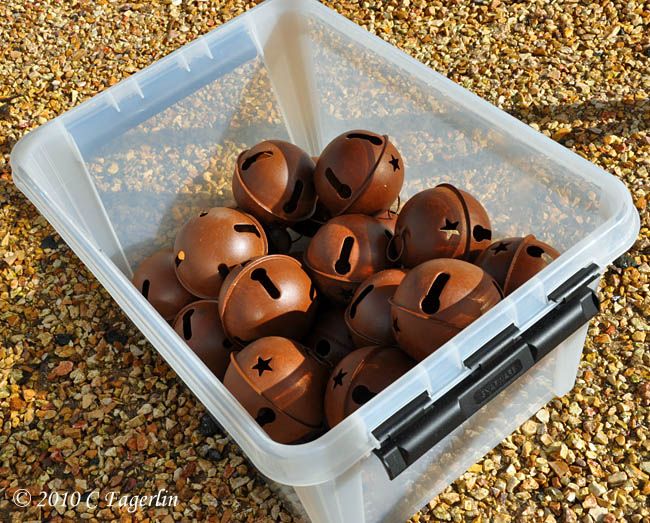
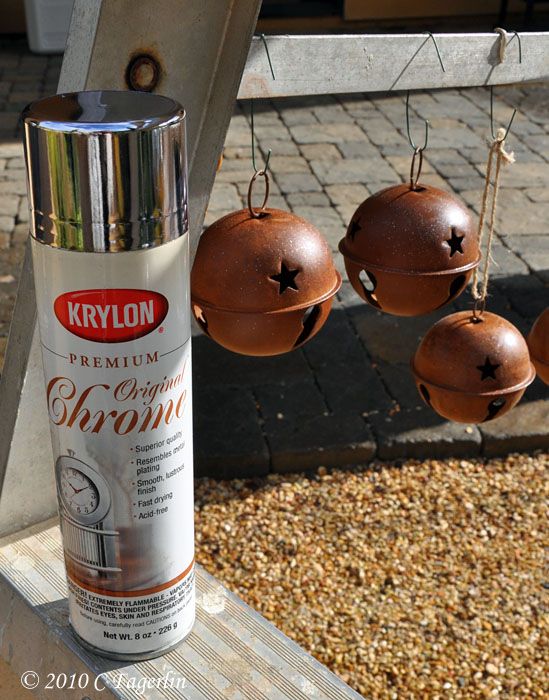
I purchased these bells at the after Christmas sales last year for 25¢
Spray paint them, and then glitter or leave plain. Lots of large multi-colored
balls fell victim to the spray paint too!
balls fell victim to the spray paint too!

Rain brought a stop to my painting project, but I was well on my way to
having more than enough "new" ornaments for the tree.


Among the things I purchased at Michael's for 50% off
plus additional coupon discounts, was a box of 18 silk
wedding fans. Final cost was about $7.50 for the 18 "ornaments."
Same story - spray on adhesive, sprinkle with glitter
and you have glittery stylin' ornaments! These could also
be embellished with findings.

Last, but not least I took a box full of those clear plastic ornaments that
I made about 10 years ago. You pour various colors of craft paint into
the ornament, swirl it around and end up with a marbelized result or
faux mercury glass by adding spritzes of water to the process.
I simply added glittery stickers to the outside and they were done!
Thanks so much for coming by to help with my Christmas Tree Makeover!
Please jump on over to the second post to see the fully decorated tree!


I love everything! So many great ideas! thank you for sharing. I would be honored to have you add it to my blog party
ReplyDeleteAmaze Me Monday Blog Party
Your tree is amazing! I love all the colors.
ReplyDeleteYou've been a busy crafter getting ready for your new look on your tree. Glitter, glitter everywhere! :-D
ReplyDeleteLooking forward to seeing the finished product.
You're truly the most creative one, Candy!! Can't wait to see all these ornies on the tree.
ReplyDeletebe a sweetie,
Shelia ;)
STUNNING! I love the tree and all of the things on it. This is a tree that would take great study in order to see everything on it and then I'm sure that some things would still be missed. Thanks for all of the great ideas and instructions.
ReplyDeleteGreat ideas. I can't wait to see the finished product. Love the idea of swirling the paint in the clear balls. Oh, Heck all the ideas were fab. I will be back for the finale. Merry Christmas, Ginger
ReplyDeleteGREAT ideas!!!!!!!!!! I love anything that you make look BEAUTIFUL with little money!!:):) Thanks for the ideas and tutorial!!!!!! XO, Pinky PS, please stop by to see what I hvae been doing !
ReplyDeleteI too have been playing in the Big Three: spray paint, adhesive and glitter! It's very fun to rescue something (besides me) which could use a face lift!
ReplyDeleteWonderful idea.. Wow.. to think i could have spray painted colored balls and saved myself days of looking.. thanks for sharing your beautiful ornaments.
ReplyDeleteWow, it's all so pretty. Thank you for sharing all those crafty ways of sprucing up thing for the tree. I was just in a gift store here and all the shiny, glittery ornaments were so expensive!
ReplyDeleteI'm glad you all enjoyed seeing these ornaments receive a makeover! You can see the decorated tree by hitting the Part 2 links in the post above or check out a direct link at the top of the sidebar.
ReplyDeleteCandy
You are SO clever!
ReplyDeleteJust when I was thinking you must spend a wagon-load of cash on that big tree, I continue reading and am delighted with your craft ideas. Use it up, wear it out, make it do or do without -- just like the old recycling wisdom of New England.
Your tree is INTERESTING. Glam and sparkles, yet those cones get interesting. Stories evolve and a certain mystique is created. And here I am, going to stores and merely buying "pretty". I learned a lesson here today.
You go, girl!
Love the sparkles and all the products that you used! I also like how you used the Wedding Fans as ornaments. Great way to think outside the box.
ReplyDeleteUh, wow! Those are so cool. I love spray paint! I saw the thumbnail and a spray paint can and had to check it out! Wonderful job!
ReplyDeleteIt's all beautiful. My favorite ornament is the black with JOY! Just to sit and admire the tree would be lovely. I Love these thrifty ideas. Thanks for sharing.
ReplyDeleteThank you ladies!
ReplyDeleteI am not stressing. I am not stressing. I am not stressing. Yeah right!
Hope all of your holiday prep is going well!
Candy