
My go-to quick and easy holiday decoration is always the "tussie-mussie."
The following tutorial was posted for some Christmas decorations, but the
process is the same for any tussie-mussie. I've made some out of scrapbook
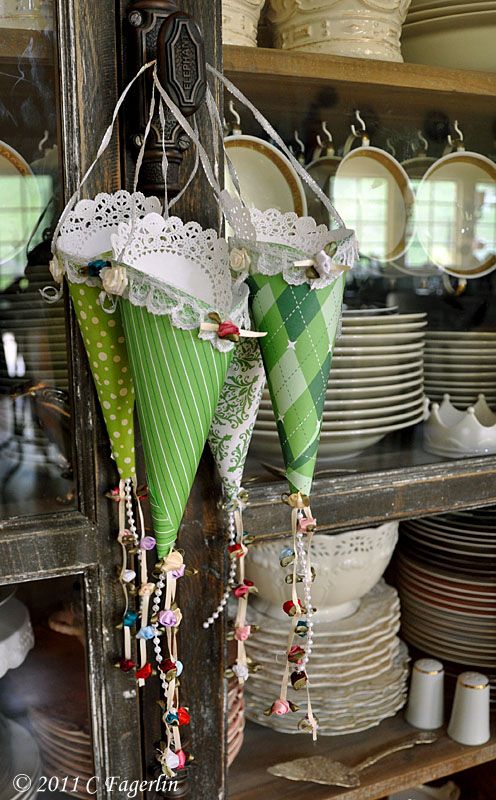
paper for May Day next week, which are shown at the end of this post.
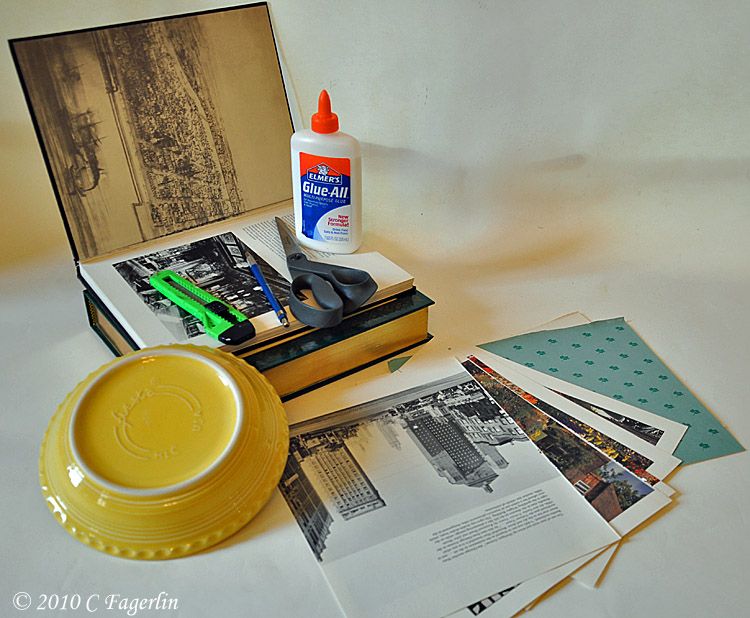
You will need the following supplies:
An old book, the larger the format the better. (Or any pretty paper stiff enough to hold its shape, like scrapbooking paper or card stock) Box cutter or X-Acto knife, pencil, scissors, glue, circular pattern (like a plate or bowl), hanging cord or ribbon. Optional: embellishments like beads, buttons, glitter, etc.
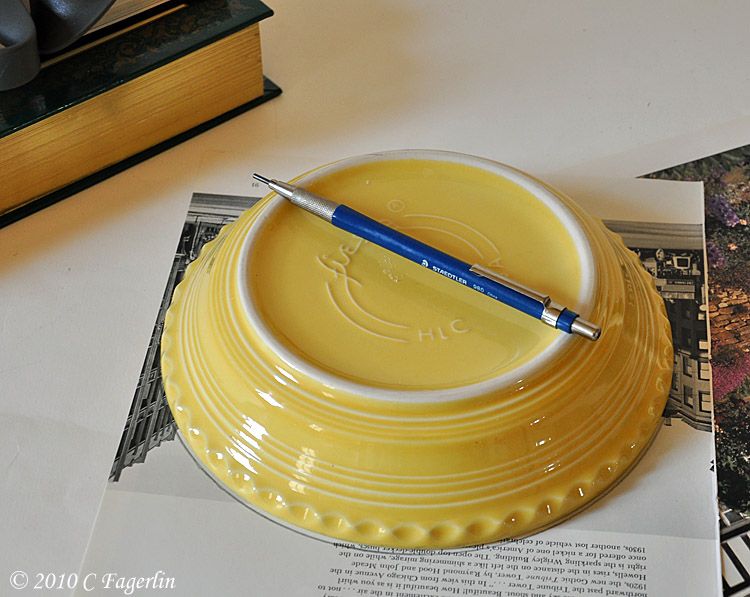
Use your knife to remove pages from the book.
Mark around your circular pattern.
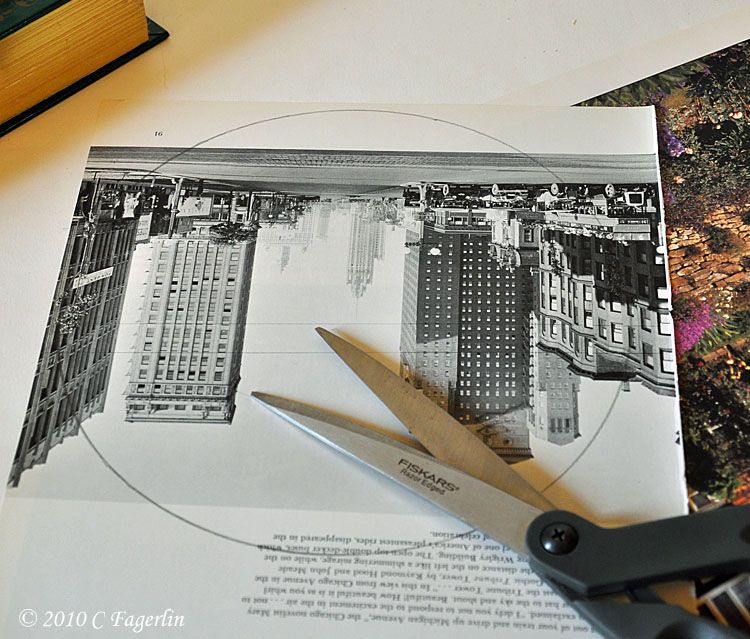
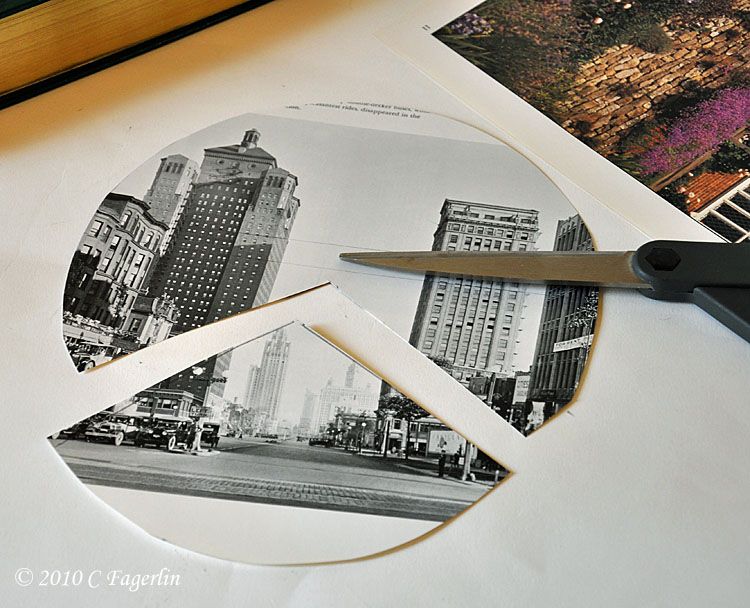
Cut out the circle shape, then remove a pie
shaped portion of the circle that is approximately 1/3 of the circle
and set it aside. (You can embellish your cones with cutouts from
these pie shaped pieces later on.)
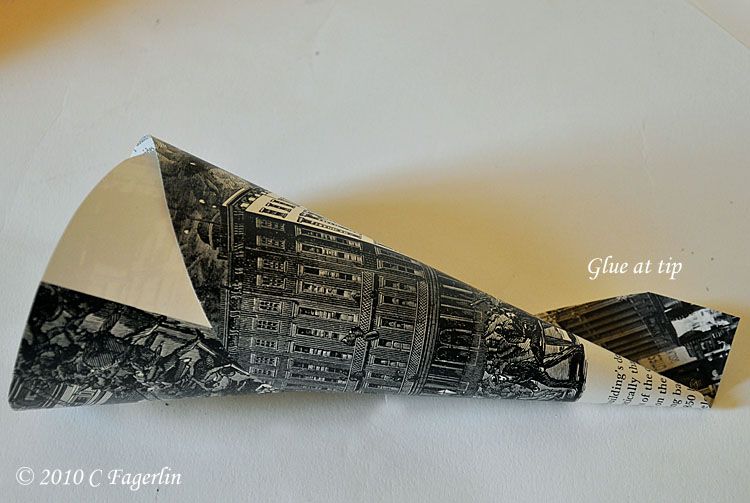
Hold the paper pie in both hands and gently roll it into a cone shape,
rolled loosely or tighter for a smaller/taller cone. While still holding
the rolled cone, put a little glue on the inside fold of the pointed tip of the cone.
Roll your fingers around the tip and hold for a few seconds until glue sets.
Where the edges touch at the top rim, again add a bit of glue to secure the rim.
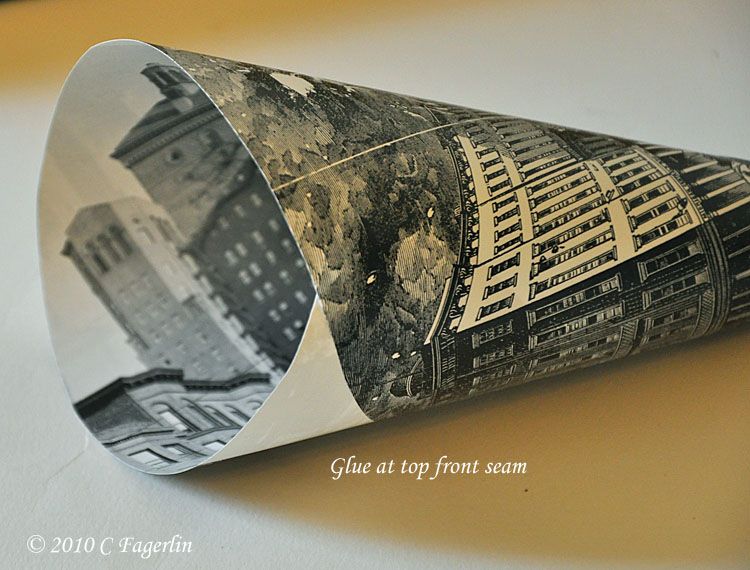
That's all there is to it! So easy and instant gratification.
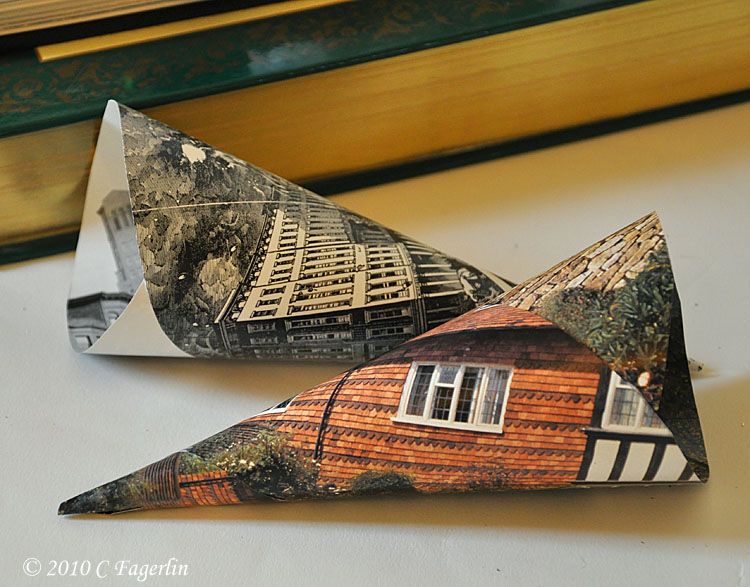
I love the way these black and white images turned out and the surprise
is that the inside of the cone also has something of interest to see.
Any book will work, the lower cone below was a page from a gardening book.
Now all that's left to do is embellish or not, add a hanging cord or ribbon.
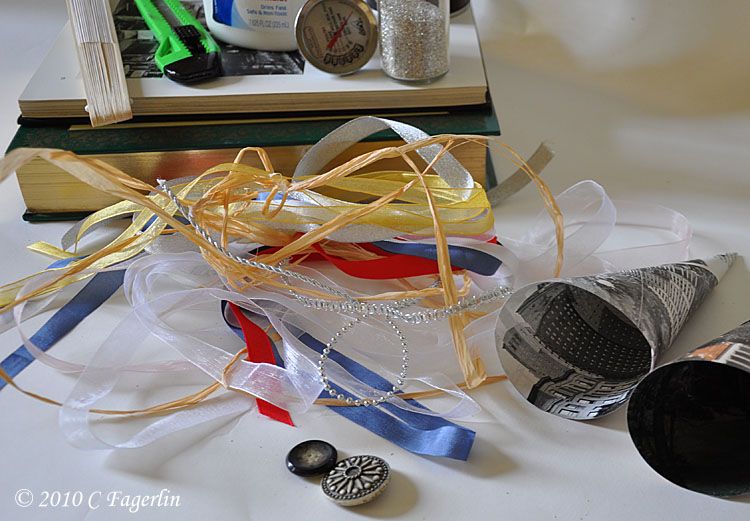
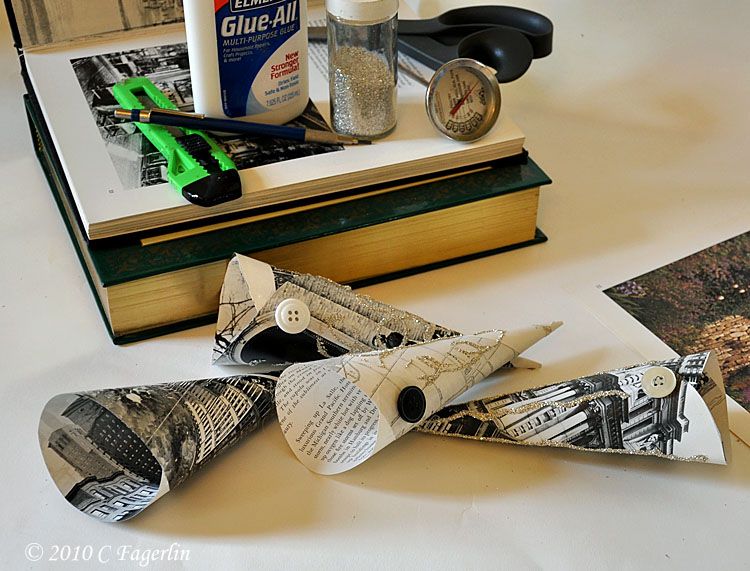
You might have noticed the meat thermometer above ???
I used it to poke a hole on either side below the top rim to string the cord through. :-) You can also add "tails" hanging from the tip of the cone by gluing them inside the tip prior to rolling the cone.

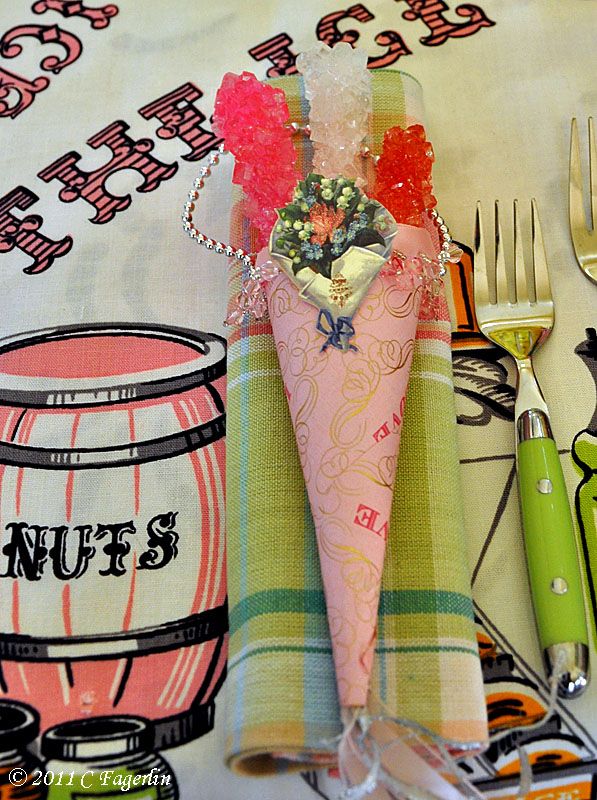
Example for Valentine's Day.
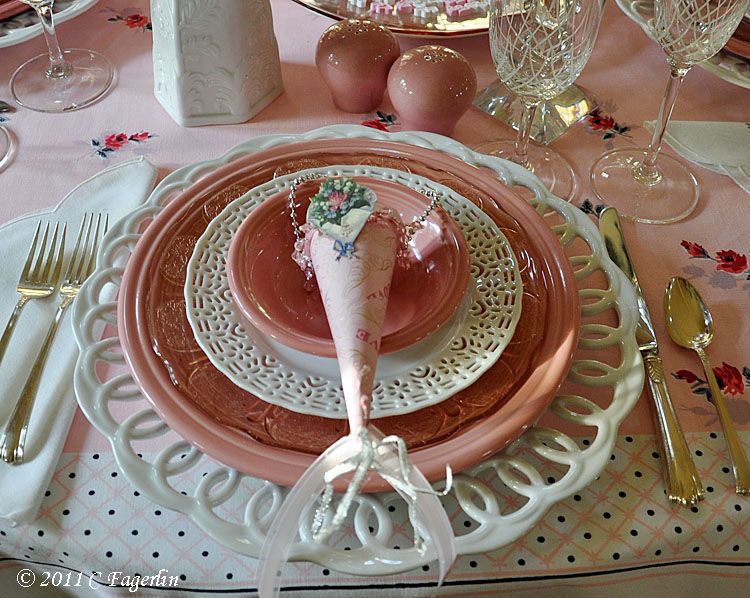
Or any party table.
That was then and now it's already May Day 2011!
How did that happen so fast???

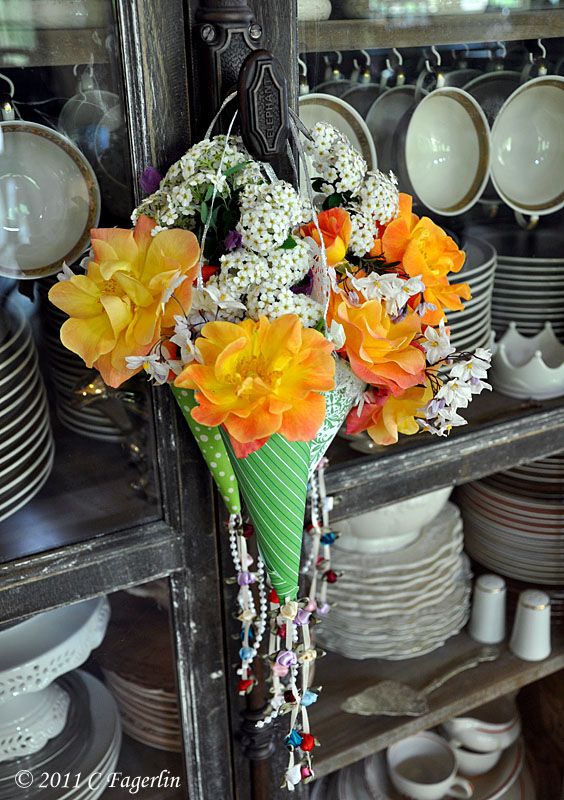

Thanks so much for stopping by and I hope someone gifts you with some pretty flowers for May Day. The roses are the first flush from my 'Joseph's Coat' climber.
I'm joining:


How pretty! I've never made these but always thought they were pretty. Thanks for the tutorial. Dropping by from BNOTP.
ReplyDeleteAllison
Atticmag
I adore Tussie Mussies, since my first introduction to them in an herb book purchased many years ago. Yours are so very lovely!
ReplyDeleteBrenda
Those are so pretty! I can remember being a very little girl and making something similar for May Day! I would fill mine with lilacs from our yard and Hershey chocolates, 2 of my Mom's most favorite things! I would hang it on her bedroom door so she wouldn't miss it! :)
ReplyDeleteThose a beautiful! I love all the new flowers that are starting to come out! :)
ReplyDeleteoooh I luv these and I have so many movie posters these will be good for.
ReplyDeletedon't forget to add it to our linking party this week
http://www.passionatelyartistic.com/2011/04/happy-easter-2011-and-linking-party.html
Maggie
http://passionatelyartistic.com
Thank you so much for showing how to make tussie-mussies. I have thought of your adorable ones from last year and wanted to make some for May Day.
ReplyDeleteAwesome. Thank goodness the roses are blooming again. I miss my flowers during the winter months.
xo
Betty from My Cozy Corner
Thanks so very much. I love it. Sheila @ Raggedykingdom.blogspot.com
ReplyDeleteNice! Thanks so much for the tutorial. I love the green tussie mussies for May Day!
ReplyDeleteOh.... those are great! I might have to give one of it a try.
ReplyDeleteLovely, Candy! Thanks for the turorial!
ReplyDeleteSo pretty! Love them all!
ReplyDeleteThank you for the tutorial..Beautiful pretties..Lovely post and thank you for sharing your inspiration.
ReplyDeleteVery pretty!
ReplyDeleteCandy, thank you for sharing this. I think I'll make some for May Day. ~ Sarah
ReplyDeleteThanks ladies! The thing I love about these is that they are so easy and quick, a great way to share some pretty posies and use up all those bits and pieces from the craft stash. :-)
ReplyDeleteThe sun is shining so I'm off to the garden very soon!
Candy
These tussie-mussies are simply wonderful! Thank you for the tutorial and the photos of the lovelies you have made. These are definitely something I want to try!
ReplyDeleteTammy
Tammy, they are so quick and easy, do try them! The green ones will appear this upcoming weekend for a May Day table, so do check back to see them again!
ReplyDeleteCandy
Love it! I was at Joann's today buying stuff to make these with. Fun to make for every holiday.
ReplyDeleteSo pretty and vintage with an updated spin!
ReplyDeletexo,
Sena
Thanks ladies, I'm pleased you enjoyed them.
ReplyDeleteCandy
Here it is 2 years later and I am going to use your little tutorial to make Tussie Mussie's for my neighbors.
ReplyDeleteI found the link to your blog on Pinterest.
Thanks.
They really are easy, quick and just too cute for any celebration. :-)
ReplyDelete