
I'm joining up with Jenny Matlock for Rainbow Summer School
This week's color is Yellow!
Come on over to Between Naps On The Porch for Susan's weekly extravaganza!
This week's color is Yellow!
Come on over to Between Naps On The Porch for Susan's weekly extravaganza!
It's time for Metamorphosis Monday!
I'm joining in on Saturday Night Special over at Funky Junk Interiors with a makeover that has been in my mind for the last three years. I've finally done it!
I'll also be linking up to Furniture Feature Friday over at Mustard Seed Creations
with one of my all time favorite pieces of furniture.
I'll also be linking up to Furniture Feature Friday over at Mustard Seed Creations
with one of my all time favorite pieces of furniture.
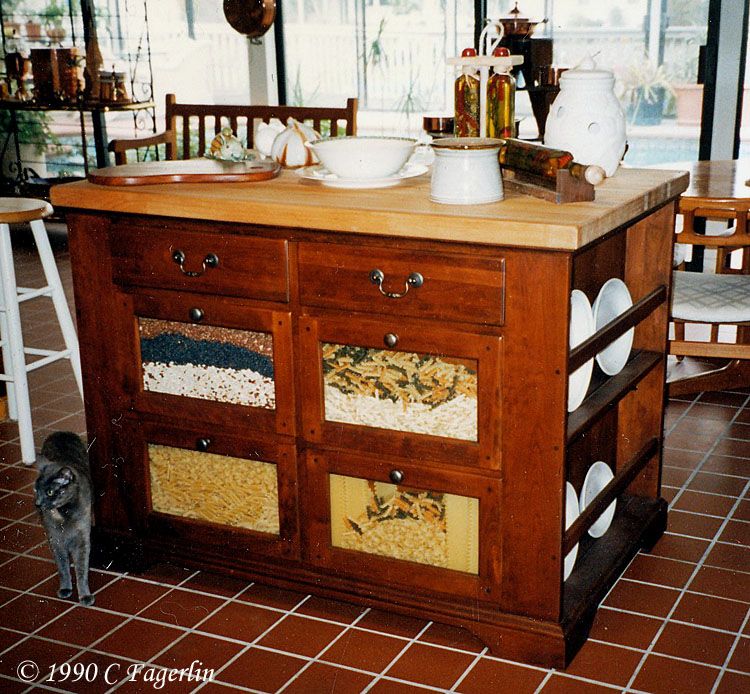
Timberlake Island is a wonderful free standing kitchen piece I've had for about twenty years.
Made by Bob Timberlake, it has been in the kitchens of our last three homes, as well as spending
a few years in my daughter's kitchen and a few years in storage because it never really worked in
our last house. Here it was circa 1990 in our house on the water in Marin.
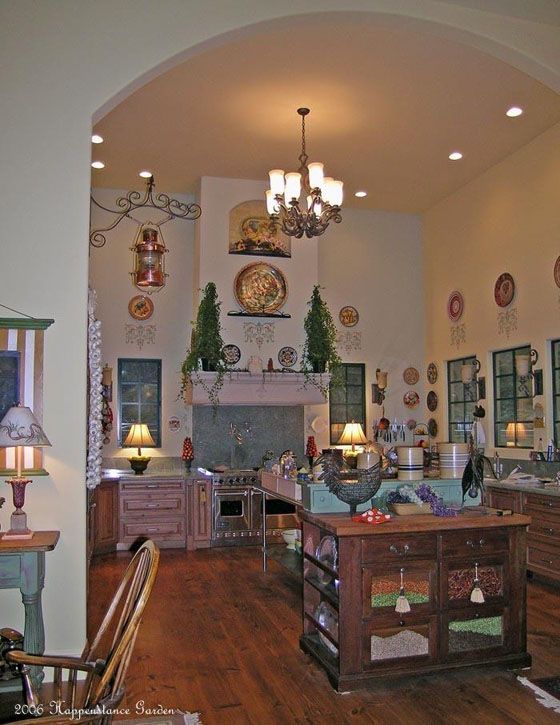
And as it appeared in one of the positions it has held in my current kitchen.
I have several free standing pieces that I use in the kitchen and I rearrange
them frequently. The large stainless prep table has moved to the greenhouse
recently, as it was a catch-all for "stuff" and wasn't being used as a prep table. :-)
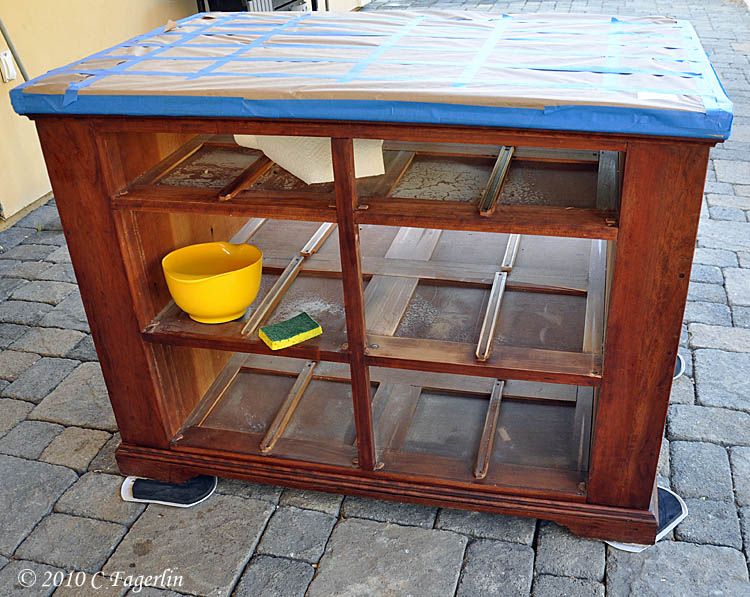
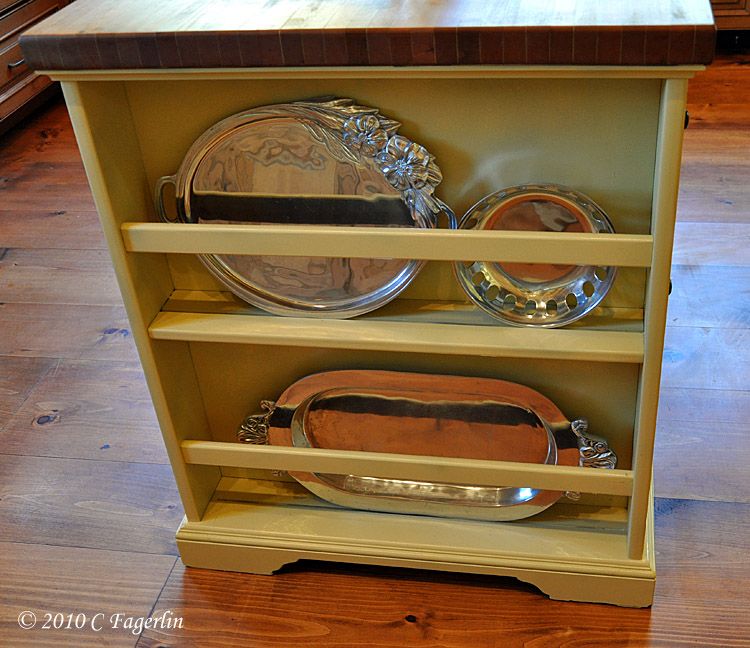
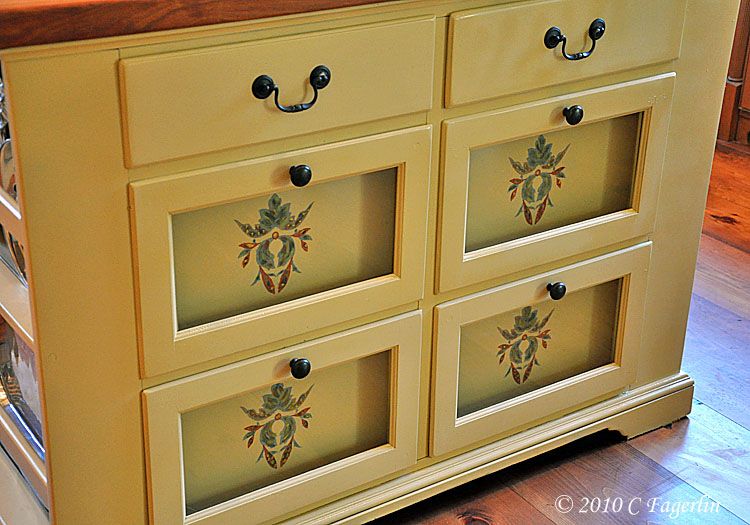
The wood island is extremely heavy even when empty. Each side has 4 large drawers and two small drawers, plus a plate rail on either end. It also has a wonderful butcher block top that has been refinished twice in its 20 year lifetime. I refinished the butcher block 3 years ago shortly before we moved to this new house and it has taken me all this time to figure out how I wanted to refinish the base.
Considering paint colors.
My favorite outdoor green was too green.
My favorite neutral "Fossil" was too gray.
So my final choice was my new favorite "Strawflower"


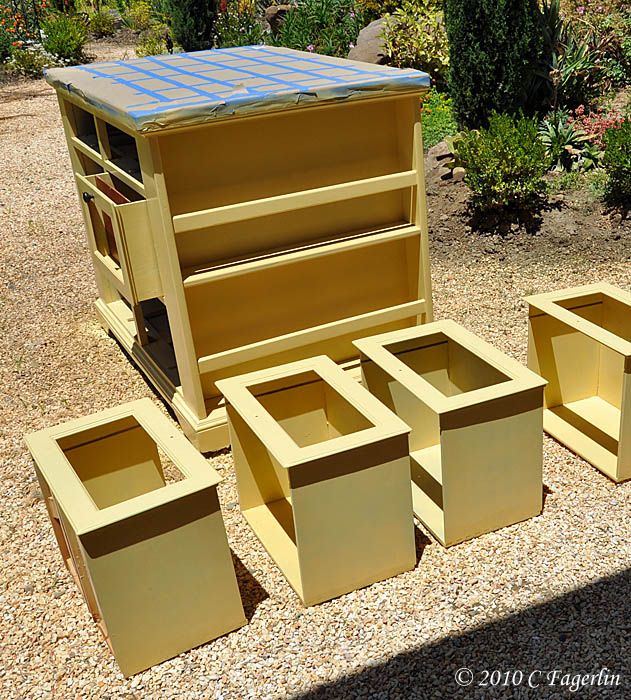
A sea of drawers, some primed and some with a first coat of Strawflower
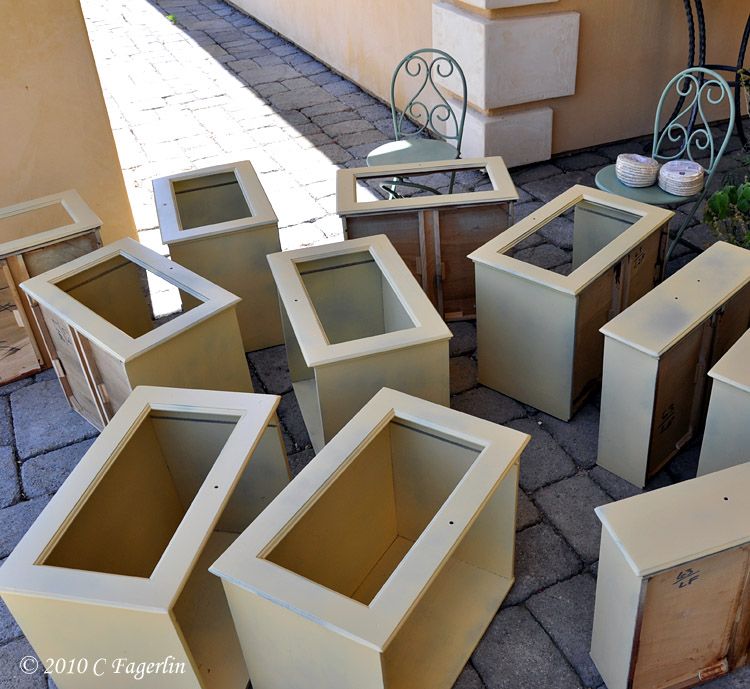
I chose to wash the base with lacquer thinner, rather than try to strip it completely or sand it, which would have been difficult with all its crevices and inaccessible places. The butcher block
top was bleached with a solution of Chlorox and water, thoroughly dried and then covered in paper and taped up.
And the paint went on.

More paint
And a coat of clear sealer before I brought it back inside.
It was positively glowing in the bright afternoon sunshine.

The spacer panels in the fronts of the large drawers were still the original finish, so the
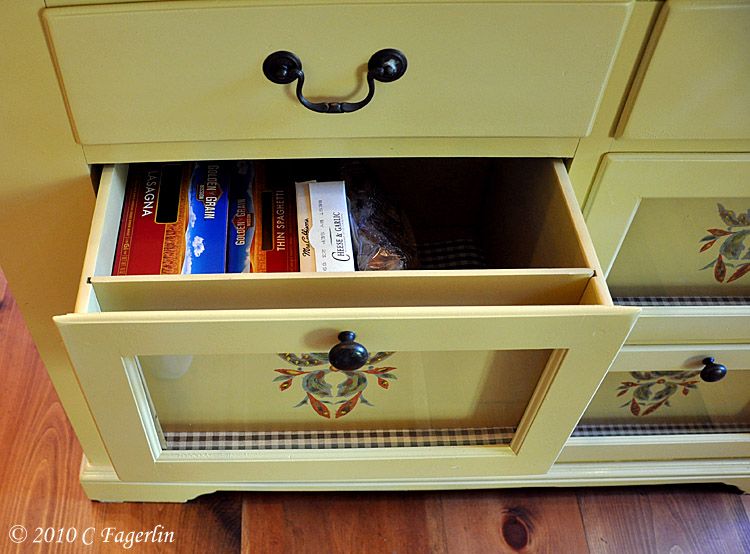
next step was to test out some ideas I had for painting them and doing something decorative to them. The glass front panels also needed to be reinstalled. I won't be putting the beans, peppers, pasta back in the drawer fronts ...... it takes constant vigilance to make sure creepy crawlies don't make their homes in the bin fronts.
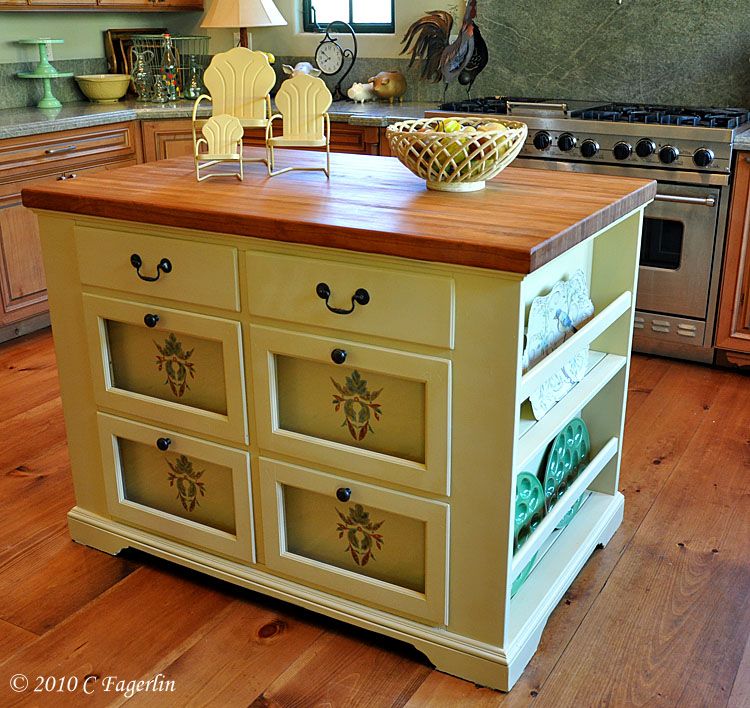
And here is the finished product. I'm liking it so much better, much lighter and brighter.
It's like having a whole new piece of furniture! The butcher block top received a heavy coat
of mineral oil and will probably need another in a week or so.

And here is the finished product. I'm liking it so much better, much lighter and brighter.
It's like having a whole new piece of furniture! The butcher block top received a heavy coat
of mineral oil and will probably need another in a week or so.

EDIT 7/14/10:
I received a number of questions on the stencil I used. It is a portion of
the larger stencil I used on my kitchen walls, although I used more intense
colors on the island rather than the muted colors I chose for the walls in the kitchen.
I also did some freehand embellishment to give it a more rustic look.
Originally I had planned to sand the wall stencils to give them some "age", but as it
turned out I liked them just the way they were. :-)
So that's one more thing I can mark off on my summer TO DO list.
Thanks for coming by for my Saturday Night Special and Furniture Feature Friday!


Love it!!! Very nice!!! Thanks for sharing!!
ReplyDeleteYou're so creative and talented!!
ReplyDeleteOh, Candy, I think of all, you are so creative and can so inspire! Thank you so much, you smart lady!
ReplyDeleteNancy
Oh my word... this is exquisite! And so is your home. The island just brings sunshine right into your kitchen!
ReplyDeleteDonna
It's looks great... love the new color! And those three metal chairs... how cute!!
ReplyDeleteThat looks amazing...what a wonderful job...and it looks so much brighter. It's unreal what a coat of paint can do!!
ReplyDeleteThe new color looks sooo good. I happened upon your site from Funky Junk and have to tell you I spied the Fiesta. I still use my Fiestaware that I received as a wedding present. Every day good stuff.
ReplyDeleteThis is a gorgeous makeover...the original was a beautiful piece of furniture and now it is even more so!!! Great job!!!
ReplyDeleteOh My Stars!! I truly LOVE this! It just took on a whole new life and I LOVE that color! Strawflower....I will have to remember that one!
ReplyDeleteBeautiful....seriously.....beautiful....
Lou Cinda :)
I just found your blog and I am a follower :)
I'm back! I also love love love those little chairs on the island! Where did you find those? Your kitchen is gorgeous!
ReplyDeleteI am going now...
Lou Cinda :)
Wow, looks brand new! I love the color. Did you roll it on? Your kitchen is so beautiful with those high ceilings.
ReplyDeleteSTUNNING!! Youre kitchen is straight out of my dreams! I love it! That island so gorgeous! l.o.v.e!
ReplyDeleteVisiting from Funky Junk
WOW! Your kitchen is to die for! I love it! And the island turned out fantastic! Those little chairs are too cute!
ReplyDeleteThanks for sharing!
~Liz
Ooh, Candy, I love it! You have such an amazing knack for deorating and gardening and I love to visit your blogs, it just makes me smile every time I read the entries on all of them. I, too, love the miniature chairs and would love to know the info/background on these. They are so cute and unique! Have a great weekend.
ReplyDeleteWhat a lot of work, but it came out magnificently! Enjoy...
ReplyDeleteGood Morning everyone!
ReplyDeleteThanks so much for all your very generous comments on my island makeover! All I can say is, "Why didn't I do this sooner?" It makes such a difference in the way the light plays off it at any given time of day.
It really was NOT a difficult project and took about 2 days total working time. (There was a lag between doing the drawers and the base .... somehow life just got in the way. Does that ever happen to you? And then to get back nto the groove took a bit more time.)
I am a big advocate of spray paint. This is a great example of how the finished project has a much more even and smooth texture than brushing paint on. It dries very quickly and dings can easily be addressed with a quick spritz .... and this will get dings, it is after all in a working kitchen, not just a picture in a catalog. The paint is "Strawflower" by Rustoleum and I'll add an image of the can to the post here is a couple of minutes.
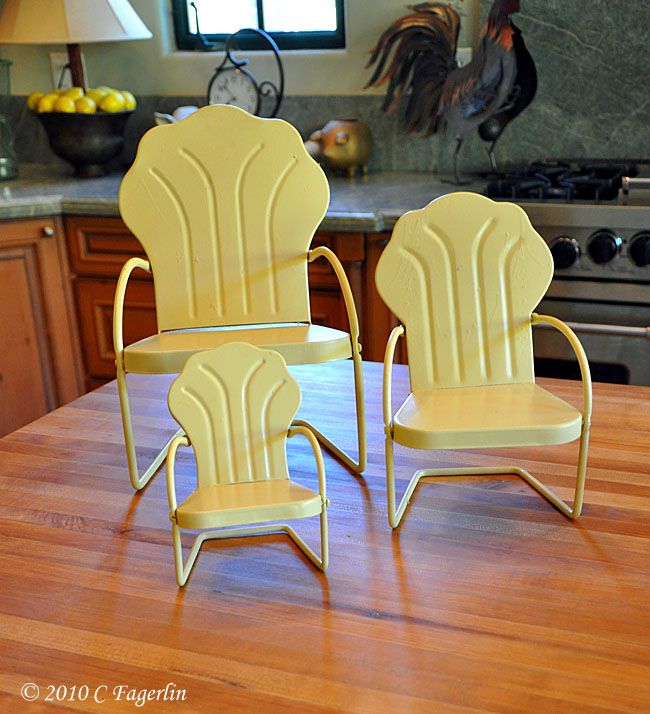
As for the little metal lawn chairs .... I have several different styles, they also change color with the simple spritz of a can of spray paint. This particular set came from a catalog many years ago ..... it might have been "Solutions", but honestly I don't really remember.
This is a project that I should have done a long time ago, but I can honestly say that it took just the right moment in time to make it come out as I saw it in my mind's eye.
Candy
That is a beautiful update! Love your color choice and the stencils were a clever idea also.
ReplyDeleteStopping by from Donna's SNS.
Wow! I love the transformation. I remember that island....and remember coveting it back in the day, but it was not to be mine. (I did end up with a Bob Timberlake china cabinet so all was not lost!)
ReplyDeleteI remember this piece of furniture from a while back as I so wanted one when I finally had a kitchen of my own. Love you redo. Great color choice.
ReplyDeleteIt's beautiful! You did a wonderful job on it and it looks great in your kitchen.
ReplyDeleteVery pretty and cheerful!
ReplyDeleteWhere did you find your interesting stencil? I love the detail!
Mary
From Virginia
What a fabulous makeover! And I'm totally jealous of those high ceilings in that huge kitchen. I believe I'll hang out and look around some more. :)
ReplyDeleteOh, Candy! I didn't think your kitchen could look any better! I love this and the color is perfect - love the little stencils!
ReplyDeleteBe a sweetie,
Shelia ;)
That's so cute. The stencils are a great touch. Great job.
ReplyDeleteWhat a wonderful transformation! I LOVE it creamy yellow... ENJOY it!
ReplyDeleteI just recently stated on my blog that I don't like the color yellow...and now I have to eat my words. That shade of yellow is very, very pretty! Love what you did to the drawer fronts. You have a beautiful kitchen. I just love the huge, tall arch!
ReplyDeleteIt is just so much better. I t looks lighter and much happier. Thanks for sharing.
ReplyDeleteLOVE IT!!!!! What a fabulous job you did, and thanks for all the "how I did it" step by step information. Great tutorial for all of us whose wheels have started turning for future projects.
ReplyDeleteThat's awesome that you have had that same piece all these years. woot!
Thanks for a great post. Enjoyed visiting and I love that color.
Love the new color, is fantastic! Great job.
ReplyDeleteHugs
Charo
LOVE your makeover! That color is perfect! You did an amazing job!!
ReplyDeleteWow....that turned out fabulous. It looks spectacular in your already fabulous kitchen. I had never thought of the creepy crawly things in those drawers before but it does make sense. I love what you did with it instead.
ReplyDeleteBecky
It's such a wonderful piece it looks great both ways. Nice that you have the courage to do the change out. Hope you'll stop by and see us. Jane F.
ReplyDeletethat looks amazing! it is so updated and current!
ReplyDeleteThank you all for coming by to see my island makeover! And thanks for all the raves on how it turned out.
ReplyDeleteThe stencil is a portion of the stencils I did on the kitchen walls even before we moved in. I think I posted a closeup of the full stencil, but I sure can't find it on the blog right now. I'll add the image to this post once I locat it.
Thanks again ...... Mr. TLRT is ready to hide all my spray paint, but he doesn't know where I keep my main stash! LOL
Candy
I found the image of the wall stencil and have added it to this post for those of you who asked.
ReplyDeleteThanks,
Candy
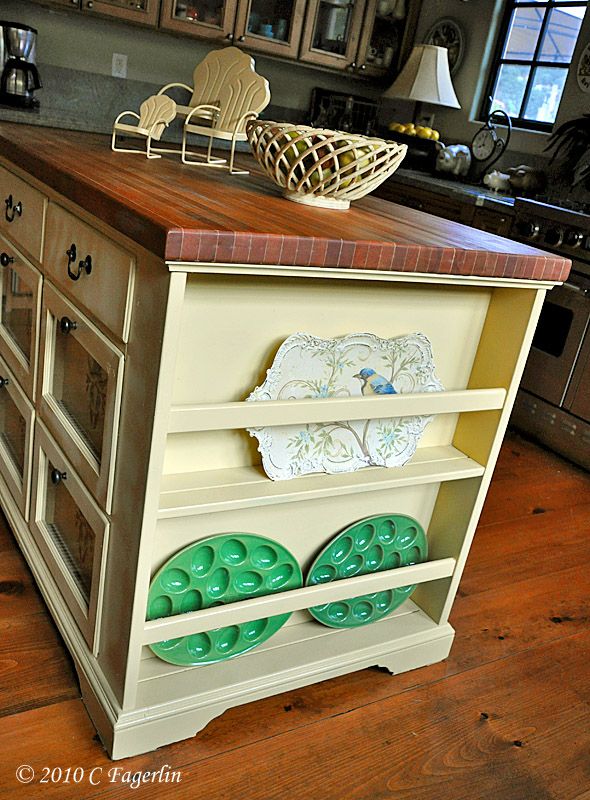
Hi Candy, your kitchen just gets better and better everytime I visit (daily.lol) I hope to someday have a large open kitchen like yours. I do have a question, in one of the photos it shows the side shelves of the island. On the top shelf is a platter with a blue bird on it. I LOVE THAT PLATTER! I would love to get one for my bedroom, its cream, cocoa and robins egg blue and I have a few birds shattered through. Please tell me where you got that platter, its fabulous and I have to have one. lol
ReplyDeleteHi Lucky!
ReplyDeleteThat "platter" is actually a painted metal tray that I purchased recently at Pier 1 .... it was on sale for about $12 if I recall correctly. Probably 3 months ago or so.
Thanks for coming by to visit!
Candy
Hi Candy! I've just linked with your blog.
ReplyDeleteI luv what you did with this island! Did your hubby help? I'm wondering...as my hubby has worked with me sometimes on repairing and refinishing projects. We both took a 'refinishing antique furniture' course, years ago.
If you'd like to link with my blog...I'm a 'vintage picker', who'd luv to do it full time! LOL
Take care, Diane :O)
Hi Diane -
ReplyDeleteNo Mr. TLRT had no part in this project .... he does a lot of wonderful things with/for me, but painting is NOT something he does. :-)
Thanks for coming by!
Candy
Beautiful! It's so hard to work with yellow and your choice was perfect. That was a big job, well done!
ReplyDeleteThanks Becky, I appreciate you coming by!
ReplyDeleteCandy
Where did you find those sweet metal chairs....I just love them....
ReplyDeleteCandy, I think this looks terrific in its new yellow attire. You definitely have style! Love the little trio of chairs sitting on top. They are so cute. ~ Sarah
ReplyDeleteWow, that is stunning and the colour you chose is so gorgeous. I love it!
ReplyDeleteBest wishes,
Natasha.
Thanks for stopping by to see my Yellow!
ReplyDeleteThe little chairs ...... from my answer up above:
As for the little metal lawn chairs .... I have several different styles, they also change color with the simple spritz of a can of spray paint. This particular set came from a catalog many years ago ..... it might have been "Solutions", but honestly I don't really remember.
Hope to see you again soon!
Candy
It looks wonderful. I love the drawer insets. They look great! I would love to have this much storage.
ReplyDeleteGorgeous Yellow Island! You did a fantastic job on it too! I love it!
ReplyDeletegorgeous finished! I would love to have that island..
ReplyDeleteWonderful finish to that island! Love the stencil!
ReplyDeleteHave a great weekend,
LOLA:)
PS Mine this week is OVER HERE! Hope you can stop by.
it is so pretty in yellow! I love the little lawn chairs on top too...what a fun project that turned out great!
ReplyDeleteIt's just gorgeous! I often wondered about the upkeep on those spacer fronts when filled with real food items. You answered that question. We live in Texas, which tends to be bug city anyway. I certainly don't need to give them an invitation:) I love the color you chose, it's really beautiful. I cringed initially at the thought of painting that gorgeous wood, but I love the way it turned out. Great yellow post!
ReplyDeleteThank you all for stopping by to see my Yellow Post!
ReplyDeleteKat - I think that's why it took me so long to pick a paint color ..... I was reluctant to paint the wood, but it had some water damage from the few years it spent in storage, which painting it solved. :-)
Candy
Love it - what a beautiful cabinet - and the little chairs....get post...bkm
ReplyDeleteAbsolutely gorgeous transformation. When I looked at the "before" picture I thought "hmmm...that already is so cool...why is she doing that?"
ReplyDeleteBut I can see how your decorating vision paid off. This is delicious.
And such a fun stop on my little journey through Alphabe-Thursday's Rainbow Summer School.
Thank you for linking!
A+
Thanks bkm and Jenny!
ReplyDeleteDo make sure you enter the 1st Anniversary Giveaway!
Candy
Pandora
ReplyDeleteYeezy boost 350 v2
Jordan Retro 11
Air Max 270
Kyrie Irving Shoes
Yeezy boost
Pandora Outlet
Air Jordan Retro 11
Air Jordan 9
Paul20180912