
This is a tale of inspiration and a makeover that spanned ten years in time, where the results became something better than the sum of its parts.
In 1979 when we moved back to California from the mid-west, I left behind an example of hideous 70s design. It was a vision of dark wood grain Formica, black vinyl and stainless steel frames. Similar to this one on Craig's List. There are not too many stock images of this design on the internet, which is a good thing! The whole of the 70s is best forgotten.
 At the time I was on a total Scandanavian Design kick. The look of rosewood and teak and "modern" Americanized versions of well built, inexpensive furniture. (I was still trying to convince Mr. TLRT that "eclectic European" was the way we should go.) This "little round table" became our kitchen table for the next 20 years or so, until it was replaced by a farm table in the mid 90s.
In 1979 when we moved back to California from the mid-west, I left behind an example of hideous 70s design. It was a vision of dark wood grain Formica, black vinyl and stainless steel frames. Similar to this one on Craig's List. There are not too many stock images of this design on the internet, which is a good thing! The whole of the 70s is best forgotten.
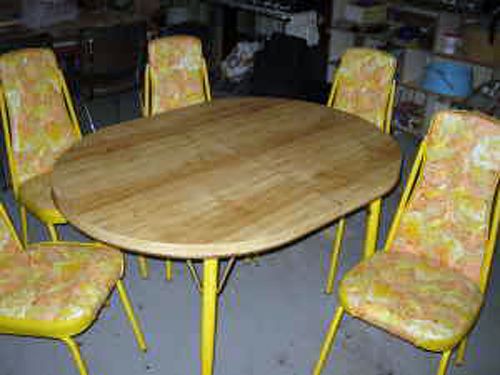
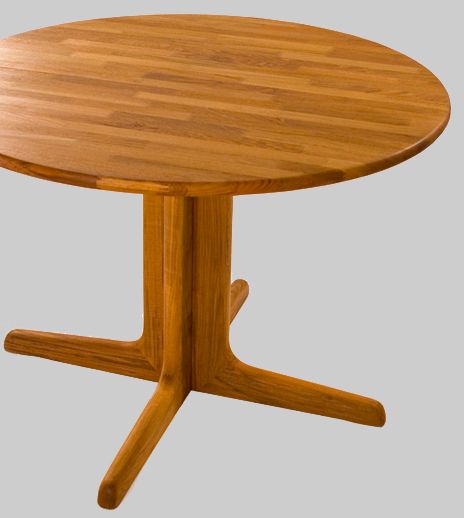
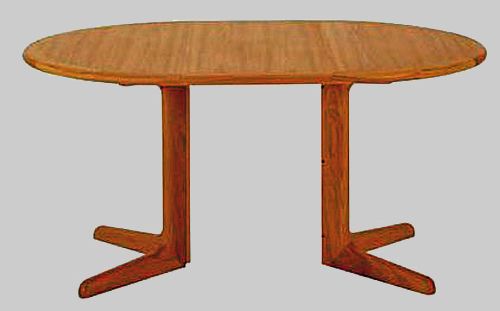
These are images of a similar table, still available today. The design is the same, but the boards used in our table ran the full width of the table and it was constructed of lumber a full 3" wide by 1½" thick. No MDF or veneer involved. It had one large leaf, which came in handy as our kids became teenagers and went through the "he looked at me" and "she touched me stage."

You can read about my last kitchen HERE
Yes, I still have the CHAIRS!
Image by Dan Mayers for Country Collectibles Fall 2002
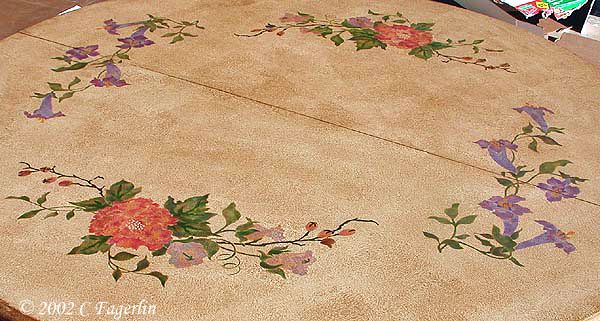
Back to the little teak table. My DIL wanted a new dinette set and wanted me to paint the little teak table for her growing family. At the time her kitchen wouldn't accommodate the table with the leaf (several years later when the family moved to a larger house, we would regret not looking harder for the missing leaf). Painting teak can be problematic because of the oils in the wood and it's natural resistance to water, but lots of sanding and sealing solved that issue.
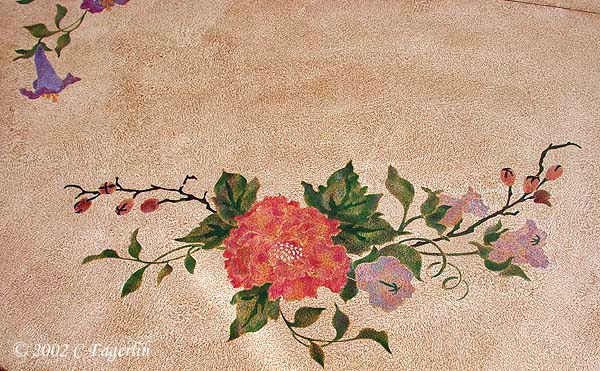
We ended up with a textured faux leather finish with floral stencils using a couple of base coats, multi-colored acrylics for the stencils, a copper based glaze, followed by a couple coats of clear matte finish. The base coats were rolled on with a long fiber roller to give it the texture.
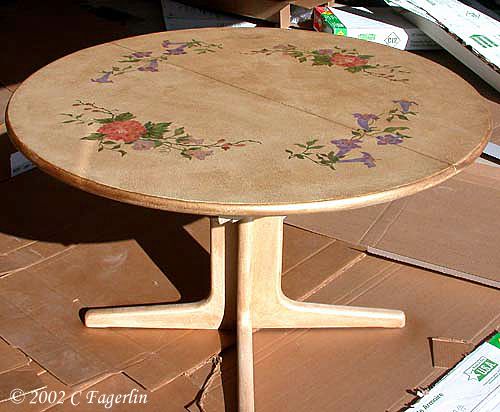
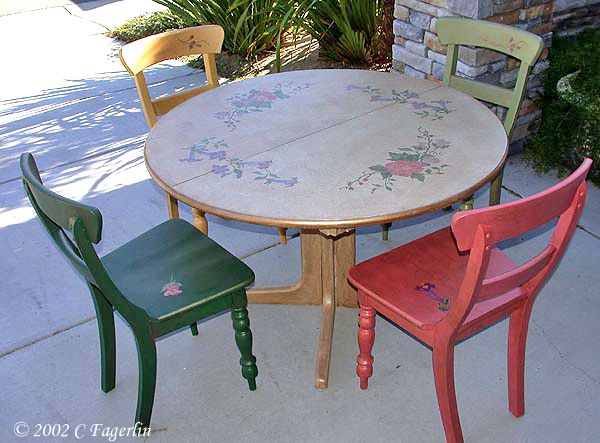
DIL picked out these unfinished chairs and they were painted with the same acrylic colors used for the stencils. Again a couple of base coats, 2 coats of color, stencils, sealed with clear matte finish.

We topped it with glass and the family is still enjoying it today.
The Rest of the Story
The missing leaf to the teak table was found when we moved to the new house in late 2006. I knew someday I would re-work it into something awesome. Have you discovered Pinterest?
Inspiration hit yesterday as I cruised the wonders on Pinterest.
Bathtub caddies from:
Bathtub caddies from:
Eureka!


Mr. TLRT helped me turn over a new leaf ..... in about an hour!
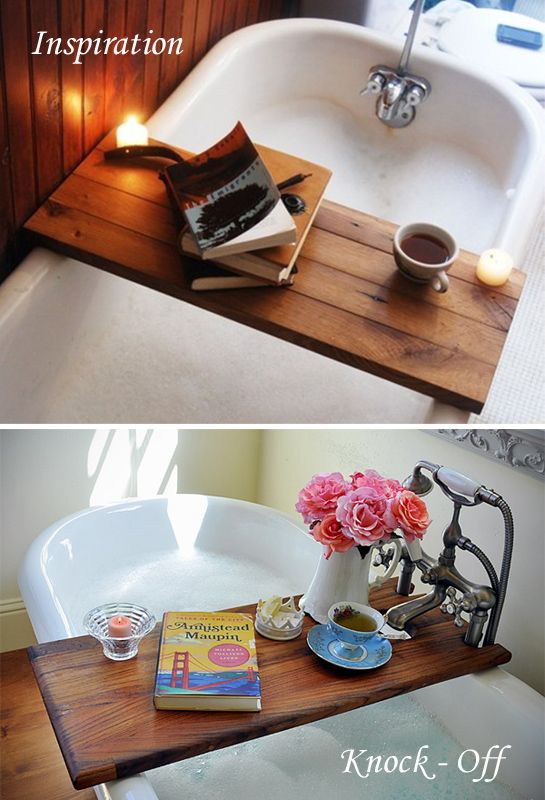
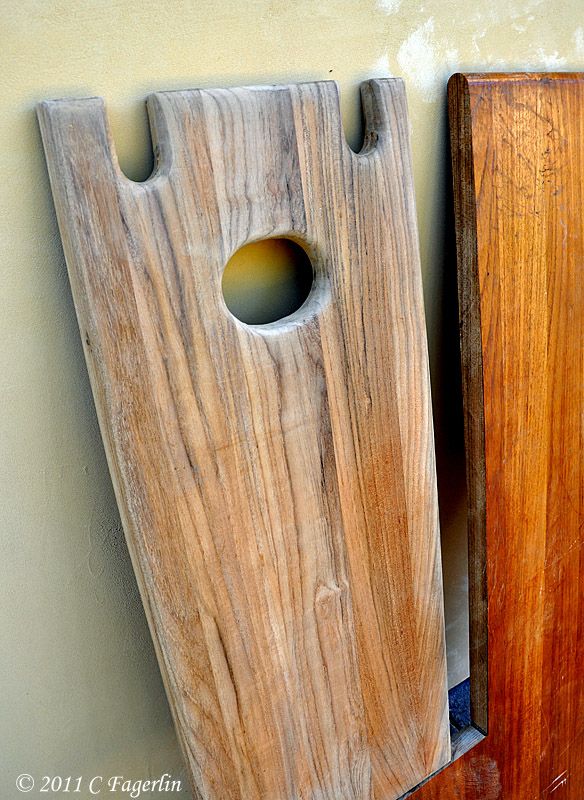
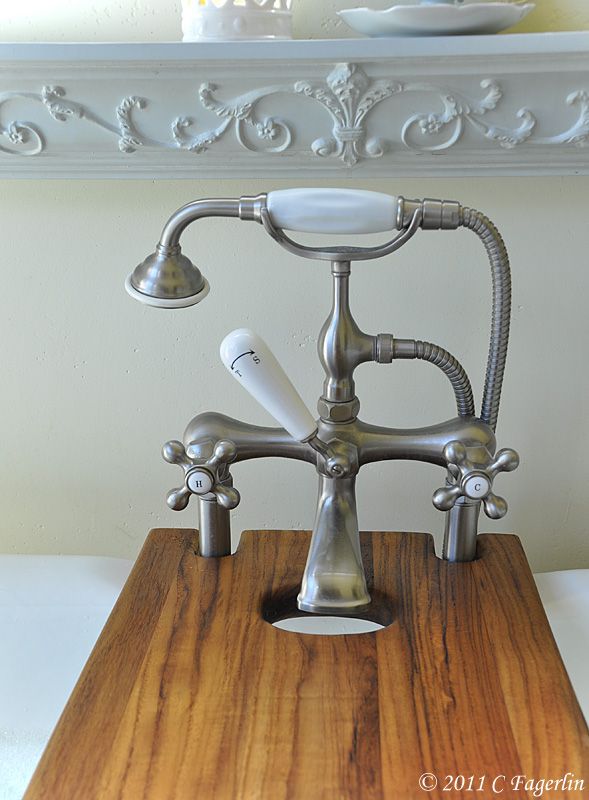
We made a pattern to accommodate the center mounted faucets and spout on the claw foot tub. The cut-outs that wrap around the supply pipes stabilizes the caddy so it doesn't move around and also allows the caddy to be rotated out of the way when your bath is completed.
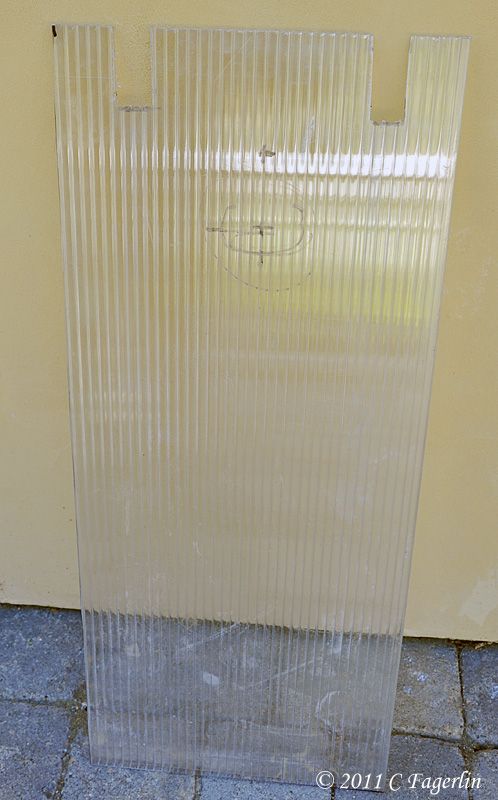
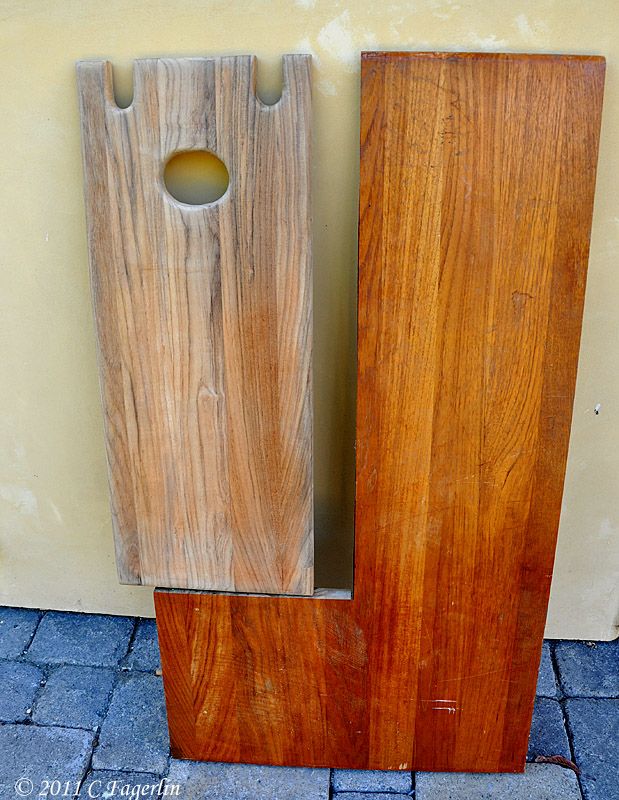
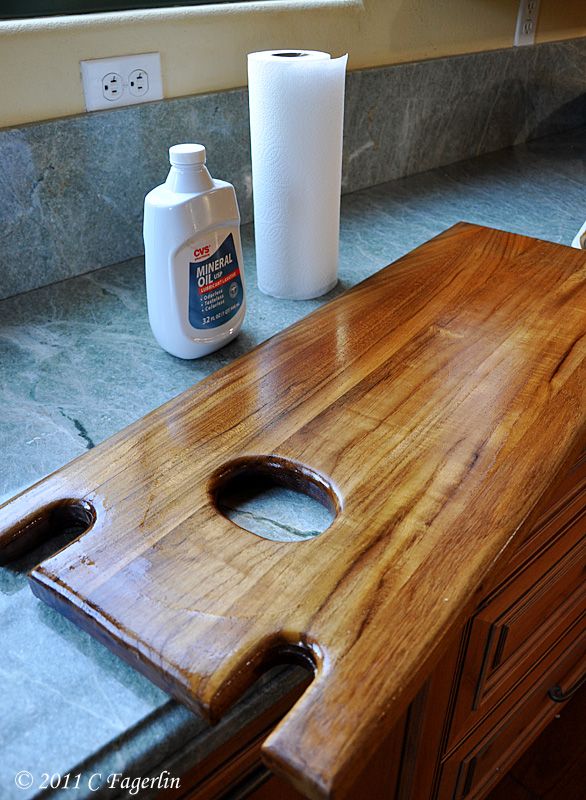
Mr. TLRT is speedy and had the caddy cut and sanded before I could even get the camera! Here's the leaf and the piece taken out for the caddy.
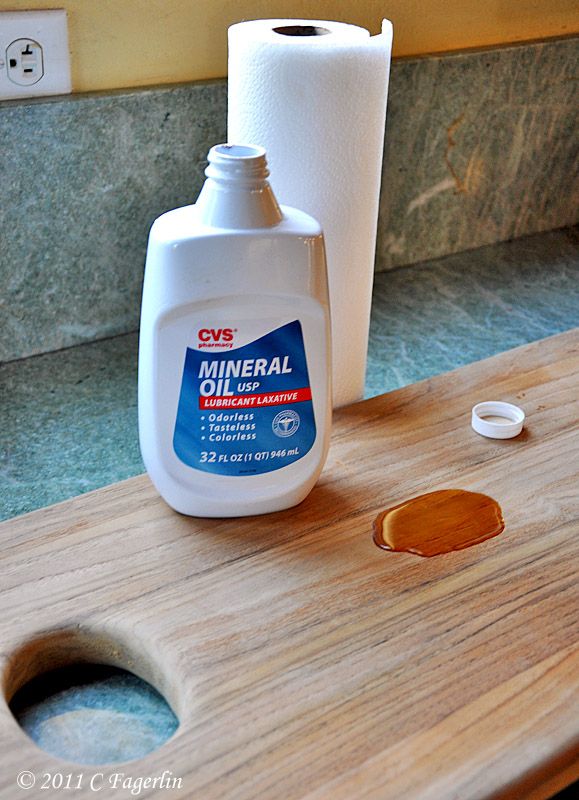
A couple coats of mineral oil to bring out the color of the teak, which is perfect for wet situations.
A morning bath.
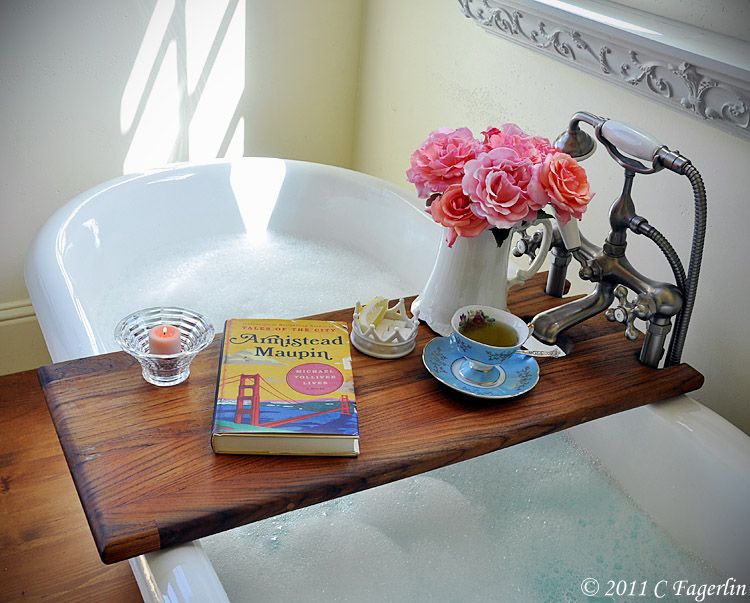


I love my Mr. TLRT, but I love my new bathtub caddy almost as much!
Scroll back up and check out how much of the leaf is left over ......
I see some awesome cutting boards in my future!
Total cost = ZERO, unless you want to factor in the original cost
of the table in 1979 which was $149.00.
Thanks so much for stopping by today.
I'm joining:
Metamorphosis Monday at Between Naps On The Porch
Alphabe-Thursday at Jenny Matlock for the letter "K" - "K" is for my knock-off tub caddy!


Hi Candy~ ~What an amazing idea. Your painting of the table is lovely you are such a talented gal. I loved this post. Have a beautiful Sunday night.
ReplyDelete~ ~Ahrisha~ ~
The table is adorable but the tub tray is awesome!
ReplyDeleteLove those chairs! And that bath looks so inviting!
ReplyDeleteJeanine
Hi Candy! What a wonderful story about your little tables and I do love those sweet chairs. The bathtub caddy is amazing! Love it. You certainly have a handy hubby!
ReplyDeletebe a sweetie,
Shelia ;)
Genius! I love your bathtub, we had one of these when I was growing up, and it's really a good idea to put the faucet in the middle. Your hardware is gorgeous.
ReplyDeleteThis is fantastic! I love that you made a hole for the faucet. Charming!
ReplyDeleteLovely table, the painting on it is gorgeous. Also love that bathtub caddy :)
ReplyDeleteI love the way your table turned out,definetly a labor of love, the multi colored chairs adds a bit of whimsy. The bathtub caddy is a wonderful addition. hugs ~lynne~
ReplyDeleteSo cool, great idea and turned out just beautiful!
ReplyDeleteYou are one talented girl! Love the table and your idea for the missing part!
ReplyDeleteI am now following you on Pinterest. I have a few pins of my own; just so little time to pin :(
You've certainly been busy. Wow. The table and the tub tray are so unique. I have discovered Pinterest but no time to explore it as yet. One more thing to do. Sigh. Jane
ReplyDeleteI am sooooo jealous. I have bought and returned so many tub shelves...they don't fit :(
ReplyDeleteI love yours....fantastic. Now all I need is an old table leaf!
Now that is some serious re-purposing! :) What a terrific post.
ReplyDelete~Liz
Awesome job all the way! What a great way to keep that part of the table still in use! Great idea- and the cost was perfect!
ReplyDeleteOh that is extremely smart! I knew I was missing something in the tub!
ReplyDeleteSherry
OMGosh! I had that same table and chairs only different color and covering on the chairs and I think I probably paid about the same amount. LOL What were the designers thinking in the 70s?
ReplyDeleteI love your tub caddy. It turned out beautifully with the oil rub. How luxurious.
Have a Happy Summer,
Babs
What a great idea to use your old table leaf for this! Totally beautiful.
ReplyDeleteI love this - so elegantly simple; so homey and rustic yet feminine. Aged wood - what could be better especially with the contrast of the white porcelain tub. Beautiful project.
ReplyDeleteSo beautiful-both the painted table and chairs and the caddy. Isn't it incredible how a picture can get our creative wheels in motion!
ReplyDeleteYou did a great job on the teak table! Love that bathtub Kaddy!
ReplyDeletewould love to have the tub and the table :)
ReplyDeleteFirst, I would love to have you for my MIL. That table and chairs makeover is astounding!
ReplyDeleteAnd your husband would then be my FIL....and maybe he would make me a tub caddy?
I promise not to get hung up on the fact that my husband and I have been together for 25 years and he came with fabulous parents. :)
wow-that's a great knock off, and it is such a great addition to the tub. and i liked the term eclectic european, lol.
ReplyDeleteWow! Amazingly creative!
ReplyDeletelove these photo shots.
ReplyDeleteamusing and beautiful.
keep creative.
Love this post! The table and chairs just turned out fantastic. What a lucky DIL!
ReplyDeleteMr TLRT is quite talented! Love the tub tray.
ReplyDeleteLove the table and chair makeover too.
Thanks for linking to THT.
Rhonda
Candy, This is genius! I love your new bathtub tray and what a fabulous way to use the table leaf. Thanks for joining the Open House party this week.
ReplyDeletexo,
Sherry
Beautiful job on everything. Love the paint job on the table and chairs, and what a way to make use of the leaf. Love it all.
ReplyDeletewowee - that's some skills!
ReplyDeleteThat is such a great idea! The teak looks so beautiful. Just curious, what would you use on the teak if you planned to use it for a cutting board?
ReplyDeleteNothing compares with the kitchen you have now. I like to visit your site just to look. I've got to learn this Pinterest thing....everyone seems to love it.
ReplyDeleteoh, that is just beautiful!!!!
ReplyDeleteThat came out beautiful! Never thought to use wood for a bath caddy, now another thing to add to my list of things to do!
ReplyDeleteThat bath caddy is incredible! Nice job!
ReplyDeleteSo funny, that top table from the 70s is almost the same table I had in my house for years. Yellow and all. Finally replaced it when the kids finally demolished the vinyl on the chairs. I think we gave it away as no one in their right mind would have bought it. Love the bath caddy, unfortunately my tub is sort of a triangle and nothing like that would ever fit. One day I will figure out something though.
ReplyDeleteThis is absolutely, positively incredible!! I mean, I just think it is genius and it looks like something that would cost a lot of money to buy ready made. You, and your hubby, have some serious creativity and talent and we are always so glad you share it with us at Inspiration Friday!
ReplyDeleteVanessa
P.S. LOVE the table and chairs too!
Oooh~I need one of those! It's really pretty, and so functional. You did good!
ReplyDeleteWhat a wonderful idea, project and photo shoot! Stunning! Such a lovely place to unwind.
ReplyDeleteShared this on FJI Facebook for SNS 88. :)
What a wonderful idea, project and photo shoot! Stunning! Such a lovely place to unwind.
Shared this on FJI Facebook for SNS 88. :)
https://www.facebook.com/photo.php?fbid=10150296389606141&set=a.192514281140.164586.175378011140&type=1&theater
Donna
Thank you all so much for your lovely comments! I'm so pleased with the results that I will be nudging Mr. TLRT to get me some cutting boards from the rest of the leaf. Still figuring out sizes for them.
ReplyDeleteCAS re: what to use on cutting boards to oil them
Mineral oil is the thing to use. It won't go rancid and is food safe. That's what I've always used on my butcher block island top and have never had a problem with it gumming up or going bad as other oils like olive or corn oil can after awhile.
Hope to see you all again very soon and a special thanks to Donna from Funky Junk Interiors for the FaceBook plug. :-)
Candy
That is too cute! And how beautiful with the flowers on it. Gorgeous!
ReplyDeleteOK, I'm totally jealous of your tub & the super tub tray. Mind if I come over for a soak?? Love how the tray fits so well around the pipes & the hole for the faucet is perfect. You both deserve a nice long soak as a reward for your creativity. I suggest a nice champagne & soft music.
ReplyDelete~C8>
Oh my... the tray for the tub is just awesome! Genius design work.... thanks for sharing this with all of us in Bloggyland!!
ReplyDeleteDi
This is by far one of the best projects I've ever seen on any of the blogs. And I would love to see the cutting boards you do. Gotta follow now so I won't miss a thing!
ReplyDeleteLove both of these projects! Makes me want to buy a claw foot tub!
ReplyDeleteThis was really a charming link!
You are all kinds of talented, girl!
Thanks for sharing your mad skills.
A+
Considering the day I've had today, I just logged on to your post and was taken back with the relaxing music and wonderful pictures...how inspiring your creative ideas are as well. Thanks for a wonderful place to retreat when the world wasn't being so nice....
ReplyDeleteI've been going thru your blog again and loving all the good ideas. I've forgotten a few , so I'm now pinning and also your newest follower.
ReplyDeleteCheers!
Rita @MAY DAYS
This is great! Where did you happen to find teak? I can't find it anywhere.
ReplyDeletemichael kors handbags
ReplyDeletecheap jordan shoes
texans jerseys
49ers jersey
converse trainers
adidas nmd
ghd hair straighteners
red valentino
the north face outlet
michael kors handbags
The Dolphins Flag is viewable from both sides with the opposite side being a reverse image.Fly your Dolphins Flag with our tailgate pole or 6' aluminum flagpole and adjustable flag bracket.
ReplyDeletenfl house flags
nfl flags wholesaleMiami Dolphins banners
New England Patriots stars and stripes flags
Jordan 11
ReplyDeleteJordan 11
Pandora Jewelry Official Site
Retro Jordan 11
Yeezy boost
Jordan 4
Air Max 270
Air Jordan 9
Kyrie 3 Shoes
Red Bottom Shoes For Women
Paul20190401